m (Clean up.) |
CelsiusXS2 (talk | contribs) No edit summary Tag: Visual edit |
||
| (43 intermediate revisions by 17 users not shown) | |||
| Line 1: | Line 1: | ||
{{Infobox Crash Bandicoot level |
{{Infobox Crash Bandicoot level |
||
| − | + | |name = The Great Gate |
|
| − | + | |image = <gallery>Greatgate.png|Original |
|
| + | The Great Gate Remastered.png|N. Sane Trilogy</gallery> |
||
| − | + | |number = 3 |
|
| − | |crates = 26 (20 in the Beta) |
||
| + | |crates = 37 (original)<br>38 (remaster) |
||
| − | |gem = Clear |
||
| + | |gem = {{icon|cleargem}} |
||
| ⚫ | |||
| + | |hint = Spinning a log platform lets you jump on it. |
||
| ⚫ | |||
| + | |relictimes = {{icon|sapphire}}: 1:05.00<br>{{icon|gold}}: 0:53.29<br>{{icon|platinum}}: 0:48.07 |
||
| − | |next = [[Boulders]] ([[Hog Wild]] in the Beta) |
||
| + | |developertime = 0:43.67 (Nathan J.) |
||
| ⚫ | |||
| ⚫ | |||
| − | }} |
||
| ⚫ | |||
| ⚫ | |||
| ⚫ | |||
| + | |next = [[Boulders]] |
||
| ⚫ | |||
| − | '''The Great Gate''' (のぼれ! クラッシュ lit. ''Climb! Crash'' in Japanese) is the third level of the first island in ''[[Crash Bandicoot (game)|Crash Bandicoot]] ''and is the first native village wall type of level. It involves Crash scaling a giant gate filled with [[Tribesman|natives]] and traps in order to make progress towards accomplishing his quest of saving [[Tawna]]. |
+ | '''The Great Gate''' (のぼれ! クラッシュ lit. ''Climb! Crash'' in Japanese) is the third level of the first island in ''[[Crash Bandicoot (game)|Crash Bandicoot]] ''and the ''[[Crash Bandicoot N. Sane Trilogy|N. Sane Trilogy]]'' remaster of the first game. This is also the first native village wall type of level. It involves Crash scaling a giant gate filled with [[Tribesman|natives]] and traps in order to make progress towards accomplishing his quest of saving [[Tawna]]. |
==Level design== |
==Level design== |
||
| Line 20: | Line 23: | ||
There are 26 crates in this level, less than both the previous levels. In order to break them all, however, the player will require the [[Yellow Gem|yellow gem]], found all the way on the third island on the last level, [[The Lab]]. The secret area which the gem gives access to is much different from the one found in [[Jungle Rollers]], and considerably harder. At the main level exit, a group of yellow platforms form an archway over the exit portal. The player must get across these platforms, taking care not to fall into the normal exit. The platforms lead the player not to just a small area with only a few crates, but to a whole new area, filled with crates and enemies, as well as an alternate exit to save the player the trouble of coming back to the yellow platforms. This secret area holds its own secret: a hidden alcove behind the wall that contains crates. The player must bounce behind the wall with the aid of a breakable [[ Arrow Crate|arrow crate]] and simply run to the right. The player will be unable to see the boxes so he or she must simply spin when something blocks their path. There is a smaller alcove before this that contains just one life and no additional boxes. Once Crash has broken all boxes in the main path, secret path and alcove and reaches the alternate exit without dying, he will be rewarded with a [[Clear Gem|clear gem]]. |
There are 26 crates in this level, less than both the previous levels. In order to break them all, however, the player will require the [[Yellow Gem|yellow gem]], found all the way on the third island on the last level, [[The Lab]]. The secret area which the gem gives access to is much different from the one found in [[Jungle Rollers]], and considerably harder. At the main level exit, a group of yellow platforms form an archway over the exit portal. The player must get across these platforms, taking care not to fall into the normal exit. The platforms lead the player not to just a small area with only a few crates, but to a whole new area, filled with crates and enemies, as well as an alternate exit to save the player the trouble of coming back to the yellow platforms. This secret area holds its own secret: a hidden alcove behind the wall that contains crates. The player must bounce behind the wall with the aid of a breakable [[ Arrow Crate|arrow crate]] and simply run to the right. The player will be unable to see the boxes so he or she must simply spin when something blocks their path. There is a smaller alcove before this that contains just one life and no additional boxes. Once Crash has broken all boxes in the main path, secret path and alcove and reaches the alternate exit without dying, he will be rewarded with a [[Clear Gem|clear gem]]. |
||
== Types of crates == |
== Types of crates == |
||
| − | *[[Aku Aku Crate]] |
+ | *[[Aku Aku Crate]] - 2 |
| − | *[[Iron Arrow Crate|Arrow Crate - iron]] |
+ | *[[Iron Arrow Crate|Arrow Crate - iron]] 4 (6 in N. Sane Trilogy) |
*[[Arrow Crate|Arrow Crate - wooden ]](only in the yellow gem path and the Tawna bonus round) |
*[[Arrow Crate|Arrow Crate - wooden ]](only in the yellow gem path and the Tawna bonus round) |
||
*[[Basic Crate]] |
*[[Basic Crate]] |
||
*[[Bounce Crate]] |
*[[Bounce Crate]] |
||
| + | *[[Checkpoint Crate]] 2 (1 in N. Sane Trilogy and 2nd if [https://crashbandicoot.wikia.com/wiki/Dynamic_Difficulty_Adjustment DDA ] in play) |
||
| − | *[[Checkpoint Crate]] |
||
*[[Crash Crate]] |
*[[Crash Crate]] |
||
*[[! Crate|! Crate ]](only in the Tawna bonus round) |
*[[! Crate|! Crate ]](only in the Tawna bonus round) |
||
| Line 31: | Line 34: | ||
*[[Outline Crate|Outline Crate ]](only in the Tawna bonus round) |
*[[Outline Crate|Outline Crate ]](only in the Tawna bonus round) |
||
*[[? Crate]] |
*[[? Crate]] |
||
| + | *[[Time Crate]] (1/2/3 seconds) |
||
*[[TNT Crate]] (only in the Tawna bonus round) |
*[[TNT Crate]] (only in the Tawna bonus round) |
||
| − | == |
+ | ==Hazard Count== |
*Turtles: 6 |
*Turtles: 6 |
||
*Venus Fly Traps: 7 |
*Venus Fly Traps: 7 |
||
*Monkeys: 5 |
*Monkeys: 5 |
||
| ⚫ | |||
*Tribesmen: 6 |
*Tribesmen: 6 |
||
| ⚫ | |||
| ⚫ | |||
| ⚫ | |||
==Stage parameters== |
==Stage parameters== |
||
| Line 48: | Line 52: | ||
*Brio Bonus Round Crates: None. |
*Brio Bonus Round Crates: None. |
||
*Cortex Bonus Round Crates: None. |
*Cortex Bonus Round Crates: None. |
||
| − | *'''Total Crates: 37''' |
+ | *'''Total Crates: 37 (38 Remaster)''' |
| + | |||
| + | ==Bonus Round== |
||
| + | Jump in between the two bouncy boxes until they smash and you activate the TNT below, get out of the way, either left or right, then go right. Jump into the Exclamation Mark box above, bringing the outlines into existence on the right. Jump and spin into the life box in the air and jump on each of the boxes below once, making sure not to fall. Jump to the right and all the way to the end of the Bonus Round where there are two more life boxes and the Sparkling Transport Pad. |
||
==Walkthrough== |
==Walkthrough== |
||
<gallery> |
<gallery> |
||
| + | Crash Bandicoot Prototype, Part 3 The Great Gate |
||
| + | Crash Bandicoot - E3 Beta Version, Part 3 The Great Gate-0 |
||
The Great Gate - Clear Gem - Crash Bandicoot - 100% Playthrough (Part 29) |
The Great Gate - Clear Gem - Crash Bandicoot - 100% Playthrough (Part 29) |
||
| + | Crash Bandicoot Japanese Version 100% Part 4 - The Great Gate 1 2 - Trinitrotoluene|The Japanese Version. |
||
| + | Crash Bandicoot Japanese Version 100% Part 53 - The Great Gate 2 2 - The Main Game |
||
| + | Crash Bandicoot "N. Sane Trilogy" The Great Gate (Box Gem Walkthrough) 1080 HD |
||
| + | PLATINUM RELIC CRASH BANDICOOT N SANE TRILOGY Crash 1 - The Great Gate |
||
</gallery> |
</gallery> |
||
| Line 68: | Line 81: | ||
tgg7.png |
tgg7.png |
||
tgg8.png |
tgg8.png |
||
| + | The Great Gate Remastered.png|Remastered level. |
||
| + | The Great Gate Early Proto 1.png |
||
| + | The Great Gate Early Proto 2.png |
||
| + | Great Gate.png|Icon from N. Sane Trilogy Save/Load Screen |
||
</gallery> |
</gallery> |
||
| Line 78: | Line 95: | ||
*In the yellow gem route, Crash can see the two exceeding islands: [[Wumpa Island]] and [[Cortex Island]]. |
*In the yellow gem route, Crash can see the two exceeding islands: [[Wumpa Island]] and [[Cortex Island]]. |
||
*The sound effect in the background music for the level (also used in [[Native Fortress]]) is also used in the credits for the Rugrats episode duo Meet the Carmichaels/The Box. This is likely because The Rugrats and Crash Bandicoot had the same composer. |
*The sound effect in the background music for the level (also used in [[Native Fortress]]) is also used in the credits for the Rugrats episode duo Meet the Carmichaels/The Box. This is likely because The Rugrats and Crash Bandicoot had the same composer. |
||
| − | *In the prototype, there is no yellow gem |
+ | *In the prototype, there is no yellow gem and the path that requires the yellow gem is not there. |
*In the prototype, there are more holes and slippery surface-flaming torch combinations. The level is also slightly longer (not counting the yellow gem path). |
*In the prototype, there are more holes and slippery surface-flaming torch combinations. The level is also slightly longer (not counting the yellow gem path). |
||
*It is possible to get to the yellow gem path without the yellow gem (and thus collecting all the crates) with precise jumps and zig-zagging while in the air (this is easier done on PAL due to Crash's higher jump). |
*It is possible to get to the yellow gem path without the yellow gem (and thus collecting all the crates) with precise jumps and zig-zagging while in the air (this is easier done on PAL due to Crash's higher jump). |
||
| + | |||
| − | <br/> |
||
{{Crash Bandicoot Game}} |
{{Crash Bandicoot Game}} |
||
| + | {{Crash Bandicoot N. Sane Trilogy}} |
||
| + | |||
| + | [[es:The Great Gate]] |
||
| + | [[fr:The Great Gate]] |
||
| + | [[pt-br:The Great Gate]] |
||
| + | [[ru:The Great Gate]] |
||
[[Category:Levels]] |
[[Category:Levels]] |
||
[[Category:Crash Bandicoot]] |
[[Category:Crash Bandicoot]] |
||
| Line 89: | Line 112: | ||
[[Category:Levels with Bonus Rounds]] |
[[Category:Levels with Bonus Rounds]] |
||
[[Category:Levels that Require Gems]] |
[[Category:Levels that Require Gems]] |
||
| + | [[Category:Levels with Gem Paths]] |
||
Revision as of 01:41, 11 April 2019
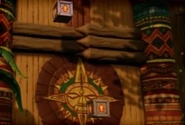
It's time for Crash to take up the challenge and climb this gate.
- Level description.
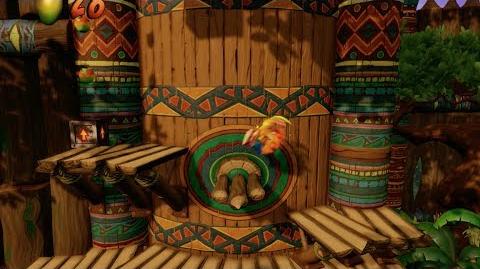
The Great Gate (のぼれ! クラッシュ lit. Climb! Crash in Japanese) is the third level of the first island in Crash Bandicoot and the N. Sane Trilogy remaster of the first game. This is also the first native village wall type of level. It involves Crash scaling a giant gate filled with natives and traps in order to make progress towards accomplishing his quest of saving Tawna.
Level design
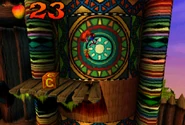
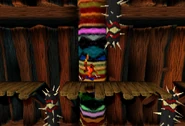
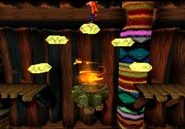
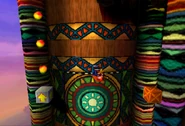
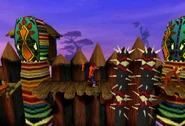
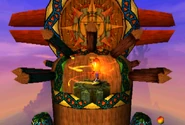
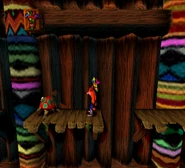
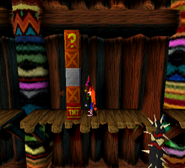
The level is completely side-scrolling, and takes Crash across several raised wooden platforms as he scales a giant wooden gate. Crash will be required to travel up several stories of the gate in order to reach the finishing point. Reaching higher areas in the level will require him to use a combination of iron arrow crates and special wooden platforms that requires him to spin them in order to make them accessible. The gate is also filled with a wide array of traps and enemies. Some of these included spiked pillars that will pierce any unsuspecting foe that is careless and special platforms that spout out flames. There are also numerous enemies guarding the paths, most notably the shield natives. Also, Crash will come across a strange terrain that is made of a green slippery surface, which will cause him to slip off the platform if he stands there for too long.
Gem
There are 26 crates in this level, less than both the previous levels. In order to break them all, however, the player will require the yellow gem, found all the way on the third island on the last level, The Lab. The secret area which the gem gives access to is much different from the one found in Jungle Rollers, and considerably harder. At the main level exit, a group of yellow platforms form an archway over the exit portal. The player must get across these platforms, taking care not to fall into the normal exit. The platforms lead the player not to just a small area with only a few crates, but to a whole new area, filled with crates and enemies, as well as an alternate exit to save the player the trouble of coming back to the yellow platforms. This secret area holds its own secret: a hidden alcove behind the wall that contains crates. The player must bounce behind the wall with the aid of a breakable arrow crate and simply run to the right. The player will be unable to see the boxes so he or she must simply spin when something blocks their path. There is a smaller alcove before this that contains just one life and no additional boxes. Once Crash has broken all boxes in the main path, secret path and alcove and reaches the alternate exit without dying, he will be rewarded with a clear gem.
Types of crates
- Aku Aku Crate - 2
- Arrow Crate - iron 4 (6 in N. Sane Trilogy)
- Arrow Crate - wooden (only in the yellow gem path and the Tawna bonus round)
- Basic Crate
- Bounce Crate
- Checkpoint Crate 2 (1 in N. Sane Trilogy and 2nd if DDA in play)
- Crash Crate
- ! Crate (only in the Tawna bonus round)
- Iron Crate
- Outline Crate (only in the Tawna bonus round)
- ? Crate
- Time Crate (1/2/3 seconds)
- TNT Crate (only in the Tawna bonus round)
Hazard Count
- Turtles: 6
- Venus Fly Traps: 7
- Monkeys: 5
- Spiked Columns: 15
- Tribesmen: 6
- Torches: 7
Stage parameters
- Aku Aku Crates: 2
- TNT Crates: None. (1 in Beta)
- Other Crates: 24 (8 hidden, 17 in Beta)
- Tawna Bonus Round Crates: 11
- Brio Bonus Round Crates: None.
- Cortex Bonus Round Crates: None.
- Total Crates: 37 (38 Remaster)
Bonus Round
Jump in between the two bouncy boxes until they smash and you activate the TNT below, get out of the way, either left or right, then go right. Jump into the Exclamation Mark box above, bringing the outlines into existence on the right. Jump and spin into the life box in the air and jump on each of the boxes below once, making sure not to fall. Jump to the right and all the way to the end of the Bonus Round where there are two more life boxes and the Sparkling Transport Pad.
Walkthrough
Enemies
In this level there are turtles which can be used to bounce on once jumped on and monkeys which roll from one place to another which can be spun or jumped on. There are also tribesmen with shields which must be jumped on, making them duck and cover themselves from above, giving the player time to spin the tribesman while he is vulnerable. If Crash gets hit by a tribesman, the tribesman will knock Crash back uncontrollably. There are man-eating plants which will eat Crash in a quick snap if Crash does not spin them. There are also flaming pits and spiked poles which Crash must avoid or he will be burned or killed. They repetitively burn/push down/up every few seconds.
Gallery
Translation of Aku Aku Hints in the Japanese Version
- The native tribesmen love peace, and don't hurt you. If you make them suffer, they won't be cautious of your spin.
- Did you succeed in Tawna's saving? If you start a saved game, you can start from the saved stage, or start from the next stage, depending on the location of the third plate.
Trivia
- It is the first level in the game (apart from the bonus rounds) and the entire Crash series to be a side-scrolling level.
- In the yellow gem route, Crash can see the two exceeding islands: Wumpa Island and Cortex Island.
- The sound effect in the background music for the level (also used in Native Fortress) is also used in the credits for the Rugrats episode duo Meet the Carmichaels/The Box. This is likely because The Rugrats and Crash Bandicoot had the same composer.
- In the prototype, there is no yellow gem and the path that requires the yellow gem is not there.
- In the prototype, there are more holes and slippery surface-flaming torch combinations. The level is also slightly longer (not counting the yellow gem path).
- It is possible to get to the yellow gem path without the yellow gem (and thus collecting all the crates) with precise jumps and zig-zagging while in the air (this is easier done on PAL due to Crash's higher jump).
| Crash Bandicoot N. Sane Trilogy | ||
| DLC Content | Crash Bandicoot: Stormy Ascent Crash Bandicoot: Warped: Future Tense | |

