(→Decals) |
m (→Deals) |
||
| (26 intermediate revisions by 3 users not shown) | |||
| Line 21: | Line 21: | ||
* all remaining items from [[Grand Prix/Back N. Time|Back N. Time]], some in new bundles |
* all remaining items from [[Grand Prix/Back N. Time|Back N. Time]], some in new bundles |
||
* new bundles for already re-added skins from the base game and from Nitro Tour were added. |
* new bundles for already re-added skins from the base game and from Nitro Tour were added. |
||
| − | * |
+ | * Decal Packs for decals from all karts from the Base Game, Nitro Tour, and Back N. Time. |
==Deals== |
==Deals== |
||
| − | Most bundles feature items discounted to |
+ | Most bundles feature items discounted to a percentage of the sum of their items' value. Some of these items can be bought separately at full price. Items already owned are discounted of their value in bundles. |
| − | Items and Bundles which are listed with a Grand Prix icon means that they |
+ | Items and Bundles which are listed below with a Grand Prix icon means that they are only available in the current Grand Prix. |
With new items being added and de-added every month (without counting Last Chance Bundles and Nitros Oxide Edition early unlocks), the total minimum cost of buying everything in the pit stop has changed quite a lot over time : |
With new items being added and de-added every month (without counting Last Chance Bundles and Nitros Oxide Edition early unlocks), the total minimum cost of buying everything in the pit stop has changed quite a lot over time : |
||
| Line 37: | Line 37: | ||
* At the start of the {{iconGP|Spyro & Friends}} [[Grand Prix/Spyro N. Friends|Spyro N. Friends]] GP, it was {{CTRNF-WC|275950}} |
* At the start of the {{iconGP|Spyro & Friends}} [[Grand Prix/Spyro N. Friends|Spyro N. Friends]] GP, it was {{CTRNF-WC|275950}} |
||
<!-- Last total (273125) - GP2 Total (60900) + GP3 Total (63725) --> |
<!-- Last total (273125) - GP2 Total (60900) + GP3 Total (63725) --> |
||
| − | * At the start of the {{iconGP|Spooky}} [[Grand Prix/ |
+ | * At the start of the {{iconGP|Spooky}} [[Grand Prix/Spooky|Spooky]] GP, it was {{CTRNF-WC|362525}} |
<!-- Last total (275950) - GP3 total (63725) + GP4 Total (73400) + GP1 Kart Sets (4500+4275*2) + GP1 Characters except Tawna (4*1500) + GP1 Skins (9*2500) + GP1 Character Paints (5*750) + GP1 Wheels (8*2500) + GP1 Decals (2*250+7*500+3*1000) + GP1 Character Stickers (3600+1000)--> |
<!-- Last total (275950) - GP3 total (63725) + GP4 Total (73400) + GP1 Kart Sets (4500+4275*2) + GP1 Characters except Tawna (4*1500) + GP1 Skins (9*2500) + GP1 Character Paints (5*750) + GP1 Wheels (8*2500) + GP1 Decals (2*250+7*500+3*1000) + GP1 Character Stickers (3600+1000)--> |
||
* At the release of the October 10 (or 14) update, it was {{CTRNF-WC|381975}} |
* At the release of the October 10 (or 14) update, it was {{CTRNF-WC|381975}} |
||
<!-- Last total (362525) + Life Saver N. Trance (2500) + GP3 Nitro Gauge Items (4275*2+1500+2*2500+900+2000) --> |
<!-- Last total (362525) + Life Saver N. Trance (2500) + GP3 Nitro Gauge Items (4275*2+1500+2*2500+900+2000) --> |
||
| + | |||
| + | ===Last Chance=== |
||
| + | Last Chances are bundles containing all Nitro Gauge rewards of a Grand Prix. They have the same cost as the Nitro Fill Up option available at the end of a Grand Prix, meaning it will be priced according to how many Nitro points a player was lacking. They are only available during the first week of the following Grand Prix. As an exception, the ''Spyro N. Friends'' bundle was also available during the fist week of ''Neon Circus''. |
||
| + | |||
| ⚫ | |||
| ⚫ | |||
| ⚫ | |||
| + | ! style="text-align:center; width: 33%;" | Items |
||
| + | ! style="text-align:center; width: 33%;"| Wumpa Coins |
||
| ⚫ | |||
| + | | [[File:spyro_n_friends_bundle.png|x150px]]<br />Spyro N. Friends Bundle |
||
| + | | [[File:spyro_n_friends_bundle_detail.png|x150px]]<br/>[[Grand Prix/Spyro N. Friends#Nitro Gauge unlocks|Items Detail]] |
||
| + | | {{iconGP|Neon Circus}} {{CTRNF-WC|14000}} |
||
| ⚫ | |||
| + | | [[File:spooky_bundle.png|x150px]]<br />Spooky Bundle |
||
| + | | [[File:spooky_bundle_detail.png|x150px]]<br/>[[Grand Prix/Spooky#Nitro Gauge unlocks|Items Detail]] |
||
| + | | {{iconGP|Neon Circus}} {{CTRNF-WC|14000}} |
||
| ⚫ | |||
===Character Bundles=== |
===Character Bundles=== |
||
| + | Character Bundles contain at least one Character or Character Skin. They also contain other items for most such as Paint Jobs, Decals, Wheels or Stickers. Bundles with four skins are discount at 25% of their value. Other Bundles are discounted at 10% of their value. |
||
| + | |||
<tabber>Base Game={| class="article-table mw-collapsible mw-collapsed" style="text-align:center;font-size:95%;width: 100%;" |
<tabber>Base Game={| class="article-table mw-collapsible mw-collapsed" style="text-align:center;font-size:95%;width: 100%;" |
||
|- |
|- |
||
| Line 79: | Line 99: | ||
! style="text-align:center" colspan="2" | Items |
! style="text-align:center" colspan="2" | Items |
||
! style="text-align:center" | Wumpa Coins |
! style="text-align:center" | Wumpa Coins |
||
| ⚫ | |||
| + | | rowspan="2" | [[File:Tawna_bundle.png|150px]]<br />Tawna |
||
| ⚫ | |||
| ⚫ | |||
| ⚫ | |||
| ⚫ | |||
| ⚫ | |||
| ⚫ | |||
|- |
|- |
||
| rowspan="2" | [[File:motorsport_squad_bundle.png|150px]]<br />Motorsport Squad |
| rowspan="2" | [[File:motorsport_squad_bundle.png|150px]]<br />Motorsport Squad |
||
| Line 87: | Line 115: | ||
| {{CTRNF Mugshot|image=CTRNF-Motorsport Liz Icon.png|rarity=legendary|px=50}}<br /><small>Character Skin</small><br />Motorsport Liz |
| {{CTRNF Mugshot|image=CTRNF-Motorsport Liz Icon.png|rarity=legendary|px=50}}<br /><small>Character Skin</small><br />Motorsport Liz |
||
| {{CTRNF Mugshot|image=CTRNF-Motorsport Isabella Icon.png|rarity=legendary|px=50}}<br /><small>Character Skin</small><br />Motorsport Isabella |
| {{CTRNF Mugshot|image=CTRNF-Motorsport Isabella Icon.png|rarity=legendary|px=50}}<br /><small>Character Skin</small><br />Motorsport Isabella |
||
| ⚫ | |||
| + | |||
| + | |-|Back N. Time={| class="article-table mw-collapsible mw-collapsed" style="text-align:center;font-size:95%;width: 100%;" |
||
| ⚫ | |||
| + | ! style="text-align:center" | Bundle |
||
| + | ! style="text-align:center" colspan="2" | Items |
||
| + | ! style="text-align:center" | Wumpa Coins |
||
| ⚫ | |||
| + | | rowspan="2" | [[File:babies_Bundle.png|150px]]<br />Cute Babies |
||
| ⚫ | |||
| ⚫ | |||
| ⚫ | |||
| ⚫ | |||
| ⚫ | |||
| + | |- |
||
| + | | rowspan="2" | [[File:Stoneage_bundle.png|150px]]<br />Stone Age |
||
| ⚫ | |||
| ⚫ | |||
| ⚫ | |||
| + | |- |
||
| ⚫ | |||
| ⚫ | |||
|} |
|} |
||
| Line 165: | Line 215: | ||
|- |
|- |
||
| colspan="2" | {{CTRNF Mugshot|image=wood paint.png|rarity=exotic|px=50}}<br /><small>Paint Job</small><br />Wood |
| colspan="2" | {{CTRNF Mugshot|image=wood paint.png|rarity=exotic|px=50}}<br /><small>Paint Job</small><br />Wood |
||
| + | |} |
||
| + | |||
| + | |-|Mixed={| class="article-table mw-collapsible mw-collapsed" style="text-align:center;font-size:95%;width: 100%;" |
||
| + | |- |
||
| + | ! style="text-align:center" | Bundle |
||
| + | ! style="text-align:center" colspan="2" | Items |
||
| + | ! style="text-align:center" | Wumpa Coins |
||
| + | |- |
||
| + | | rowspan="2" | [[File:Bikers_Bundle.png|150px]]<br />Bikers |
||
| ⚫ | |||
| ⚫ | |||
| ⚫ | |||
| + | |- |
||
| ⚫ | |||
| + | |- |
||
| + | | rowspan="2" | [[File:villains hobbies_bundle.png|150px]]<br />Villains Hobbies |
||
| ⚫ | |||
| ⚫ | |||
| + | | rowspan="2" | {{CTRNF-WC|6750}} |
||
| + | |- |
||
| ⚫ | |||
|} |
|} |
||
</tabber> |
</tabber> |
||
| Line 381: | Line 452: | ||
|{{CTRNF Mugshot|image=CTRNF-Chef_NGIN_Icon.png|px=50|rarity=legendary}}<br />Chef N.Gin |
|{{CTRNF Mugshot|image=CTRNF-Chef_NGIN_Icon.png|px=50|rarity=legendary}}<br />Chef N.Gin |
||
|{{CTRNF Mugshot|image=CTRNF-CrashTest_NGIN_Icon.png|px=50|rarity=legendary}}<br />Crash Test Dummy N.Gin |
|{{CTRNF Mugshot|image=CTRNF-CrashTest_NGIN_Icon.png|px=50|rarity=legendary}}<br />Crash Test Dummy N.Gin |
||
| − | |{{CTRNF Mugshot|image=CTRNF-Farmer NGIN.png|px=50|rarity= |
+ | |{{CTRNF Mugshot|image=CTRNF-Farmer NGIN.png|px=50|rarity=legendary}}<br />{{IconGP|Neon Circus}}Farmer N. Gin |
|- |
|- |
||
|{{CTRNF Mugshot|image=CTRNF-Hazmat_Dingodile_Icon.png|px=50|rarity=legendary}}<br />Hazmat Dingodile |
|{{CTRNF Mugshot|image=CTRNF-Hazmat_Dingodile_Icon.png|px=50|rarity=legendary}}<br />Hazmat Dingodile |
||
| Line 588: | Line 659: | ||
{| class="article-table mw-collapsible mw-collapsed" style="text-align:center;font-size:95%;width: 100%;" |
{| class="article-table mw-collapsible mw-collapsed" style="text-align:center;font-size:95%;width: 100%;" |
||
| − | ! style="text-align:center" colspan=" |
+ | ! style="text-align:center" colspan="11" | |
|- |
|- |
||
| − | ! style="text-align:center; width: |
+ | ! style="text-align:center; width: 25%;"| Kart |
| − | ! style="text-align:center; width: |
+ | ! style="text-align:center; width: 25%;" colspan="2" | Basic |
| − | ! style="text-align:center; width: |
+ | ! style="text-align:center; width: 25%;" colspan="6" | Exotic |
| + | ! style="text-align:center; width: 25%;" colspan="2" | Legendary |
||
|- |
|- |
||
| + | ! style="text-align:center;"|Classic |
||
| colspan="2" | — |
| colspan="2" | — |
||
| − | | colspan="6" | {{CTRNF Mugshot|image=raining_hearts_decal.png|px=50|rarity=exotic}} |
+ | | colspan="6" | {{CTRNF Mugshot|image=raining_hearts_decal.png|px=50|rarity=exotic}}<br />Raining Hearts |
| colspan="2" | — |
| colspan="2" | — |
||
|- |
|- |
||
| + | ! style="text-align:center;"|Team Bandicoot |
||
| colspan="8" | — |
| colspan="8" | — |
||
| − | | {{CTRNF Mugshot|image=digital_fire_decal.png|px=50|rarity=legendary}} |
+ | | {{CTRNF Mugshot|image=digital_fire_decal.png|px=50|rarity=legendary}}<br />Digital Fire |
| − | | {{CTRNF Mugshot|image=ancient_pattern_decal.png|px=50|rarity=legendary}} |
+ | | {{CTRNF Mugshot|image=ancient_pattern_decal.png|px=50|rarity=legendary}}<br />Ancient Pattern |
|- |
|- |
||
| + | ! style="text-align:center;"|Team Trance |
||
| colspan="2" | — |
| colspan="2" | — |
||
| − | | colspan="6" |{{CTRNF Mugshot|image=evening_shade_decal.png|px=50|rarity=exotic}} |
+ | | colspan="6" |{{CTRNF Mugshot|image=evening_shade_decal.png|px=50|rarity=exotic}}<br />Evening Shade |
| − | | colspan="2" |{{CTRNF Mugshot|image=high_tech_two_decal.png|px=50|rarity=legendary}} |
+ | | colspan="2" |{{CTRNF Mugshot|image=high_tech_two_decal.png|px=50|rarity=legendary}}<br />High Tech Two |
|- |
|- |
||
| + | ! style="text-align:center;"|Team Cortex |
||
| colspan="2" | — |
| colspan="2" | — |
||
| − | | colspan="6" |{{CTRNF Mugshot|image=deep_scratches_decal.png|px=50|rarity=exotic}} |
+ | | colspan="6" |{{CTRNF Mugshot|image=deep_scratches_decal.png|px=50|rarity=exotic}}<br />Deep Scratches |
| colspan="2" | — |
| colspan="2" | — |
||
|- |
|- |
||
| + | ! style="text-align:center;"|Team Oxide |
||
| colspan="2" | — |
| colspan="2" | — |
||
| − | | colspan="3" |{{CTRNF Mugshot|image=web_of_oxide_decal.png|px=50|rarity=exotic}} |
+ | | colspan="3" |{{CTRNF Mugshot|image=web_of_oxide_decal.png|px=50|rarity=exotic}}<br />Web of Oxide |
| − | | colspan="3" |{{CTRNF Mugshot|image=motherboard_decal.png|px=50|rarity=exotic}} |
+ | | colspan="3" |{{CTRNF Mugshot|image=motherboard_decal.png|px=50|rarity=exotic}}<br />Motherboard |
| − | | colspan="2" |{{CTRNF Mugshot|image=cosmic_sky_decal.png|px=50|rarity=legendary}} |
+ | | colspan="2" |{{CTRNF Mugshot|image=cosmic_sky_decal.png|px=50|rarity=legendary}}<br />Cosmic Sky |
|- |
|- |
||
| + | ! style="text-align:center;"|Hovercraft |
||
| colspan="2" | — |
| colspan="2" | — |
||
| − | | colspan="2" |{{CTRNF Mugshot|image=intergalactic_flames_decal.png|px=50|rarity=exotic}} |
+ | | colspan="2" |{{CTRNF Mugshot|image=intergalactic_flames_decal.png|px=50|rarity=exotic}}<br />Intergalactic Flames |
| − | | colspan="2" |{{CTRNF Mugshot|image=sunrays_decal.png|px=50|rarity=exotic}} |
+ | | colspan="2" |{{CTRNF Mugshot|image=sunrays_decal.png|px=50|rarity=exotic}}<br />Sunrays |
| − | | colspan="2" |{{CTRNF Mugshot|image=gasmoxian_style_decal.png|px=50|rarity=exotic}} |
+ | | colspan="2" |{{CTRNF Mugshot|image=gasmoxian_style_decal.png|px=50|rarity=exotic}}<br />Gasmoxian Style |
| − | | colspan="2" |{{CTRNF Mugshot|image=sea_of_fury_decal.png|px=50|rarity=legendary}} |
+ | | colspan="2" |{{CTRNF Mugshot|image=sea_of_fury_decal.png|px=50|rarity=legendary}}<br />Sea of Fury |
| ⚫ | |||
| ⚫ | |||
| − | | colspan="3" |{{CTRNF Mugshot|image=flying_ribbons_decal.png|px=50|rarity=exotic}}<br /><small>Cabrio</small><br />Flying Ribbons |
||
| − | | colspan="3" |{{CTRNF Mugshot|image=paint_splashes_decal.png|px=50|rarity=exotic}}<br /><small>Cabrio</small><br />Paint Splashes |
||
| ⚫ | |||
| ⚫ | |||
| ⚫ | |||
| ⚫ | |||
| ⚫ | |||
| − | | colspan="6" |{{CTRNF Mugshot|image=giraffe_spots_decal.png|px=50|rarity=exotic}}<br /><small>Crikey</small><br />Giraffe Spots |
||
| ⚫ | |||
| ⚫ | |||
| ⚫ | |||
| − | | colspan="3" |{{CTRNF Mugshot|image=royal_flush_decal.png|px=50|rarity=exotic}}<br /><small>Deadinator</small><br />Royal Flush |
||
| ⚫ | |||
| ⚫ | |||
|- |
|- |
||
| + | ! style="text-align:center;"|Cabrio |
||
| colspan="2" | — |
| colspan="2" | — |
||
| ⚫ | |||
| − | | colspan="3" |{{CTRNF Mugshot|image=sea_reef_decal.png|px=50|rarity=exotic}}<br /><small>Doom Buggy</small><br />Sea Reef |
||
| − | | colspan=" |
+ | | colspan="2" | {{CTRNF Mugshot|image=the_dragon_decal.png|px=50|rarity=legendary}}<br />The Dragon |
| ⚫ | |||
| ⚫ | |||
|- |
|- |
||
| + | ! style="text-align:center;"|Roadster |
||
| colspan="2" | — |
| colspan="2" | — |
||
| + | | colspan="6" | — |
||
| − | | colspan="3" |{{CTRNF Mugshot|image=Fiery_flash_decal.png|px=50|rarity=exotic}}<br /><small>Imperium</small><br />Fiery Flash |
||
| − | | colspan=" |
+ | | colspan="2" | {{CTRNF Mugshot|image=tropical_sunset_decal.png|px=50|rarity=legendary}}<br />Tropical Sunset |
| ⚫ | |||
| ⚫ | |||
| ⚫ | |||
| − | | colspan="2" |{{CTRNF Mugshot|image=two_tones_decal.png|px=50|rarity=basic}}<br /><small>Roadster</small><br />Two Tones |
||
| − | | colspan="3" |{{CTRNF Mugshot|image=pure_nature_decal.png|px=50|rarity=exotic}}<br /><small>Roadster</small><br />Pure Nature |
||
| − | | colspan="3" |{{CTRNF Mugshot|image=dots_n_spots_decal.png|px=50|rarity=exotic}}<br /><small>Roadster</small><br />Dots n' Spots |
||
| ⚫ | |||
| ⚫ | |||
| ⚫ | |||
| − | | colspan="2" |{{CTRNF Mugshot|image=bottom_line_decal.png|px=50|rarity=basic}}<br /><small>Six-Pipes</small><br />Bottom Line |
||
| − | | colspan="3" |{{CTRNF Mugshot|image=bling_bling_decal.png|px=50|rarity=exotic}}<br /><small>Six-Pipes</small><br />Bling Bling |
||
| − | | colspan="3" |{{CTRNF Mugshot|image=rippin_raptor_decal.png|px=50|rarity=exotic}}<br /><small>Six-Pipes</small><br />Ripping Raptor |
||
| − | | colspan="2" |{{CTRNF Mugshot|image=skull_and_bones_decal.png|px=50|rarity=legendary}}<br /><small>Six-Pipes</small><br />Skulls and Bones |
||
| ⚫ | |||
| − | | colspan="2" |{{CTRNF Mugshot|image=checkered_line_decal.png|px=50|rarity=basic}}<br /><small>Trikee</small><br />Checkered Line |
||
| ⚫ | |||
| − | | colspan="3" |{{CTRNF Mugshot|image=lightspeed_decal.png|px=50|rarity=exotic}}<br /><small>Trikee</small><br />Lightspeed |
||
| ⚫ | |||
|- |
|- |
||
| + | ! style="text-align:center;"|Daredevil |
||
| ⚫ | |||
| ⚫ | |||
| ⚫ | |||
| colspan="2" | — |
| colspan="2" | — |
||
| − | | colspan="2" |{{CTRNF Mugshot|image=pinnacle_decal.png|px=50|rarity=exotic}}<br /><small>Le Chaux</small><br />Pinnacle |
||
| − | | colspan="2" |{{CTRNF Mugshot|image=split_wave_decal.png|px=50|rarity=exotic}}<br /><small>Le Chaux</small><br />Split Wave |
||
| − | | colspan="2" |{{CTRNF Mugshot|image=flowing_arrows_decal.png|px=50|rarity=exotic}}<br /><small>Le Chaux</small><br />Flowing Arrows |
||
| ⚫ | |||
|- |
|- |
||
| + | ! style="text-align:center;"|Pressurizer |
||
| − | | colspan="2" |{{CTRNF Mugshot|image=twin_bands_decal.png|px=50|rarity=basic}}<br /><small>Bandibuggy</small><br />Twin Bands |
||
| − | | colspan=" |
+ | | colspan="2" |{{CTRNF Mugshot|image=splat_decal.png|px=50|rarity=basic}}<br />{{iconGP|Neon Circus}} Splat |
| − | | colspan="3" |{{CTRNF Mugshot|image=Avalanche_decal.png|px=50|rarity=exotic}}<br /><small>Bandibuggy</small><br />Avalanche |
||
| ⚫ | |||
| ⚫ | |||
| ⚫ | |||
| ⚫ | |||
| − | | colspan="3" |{{CTRNF Mugshot|image=Fire_storm_decal.png|px=50|rarity=exotic}}<br /><small>Rocket</small><br />Fire Storm |
||
| ⚫ | |||
| ⚫ | |||
| ⚫ | |||
| ⚫ | |||
| ⚫ | |||
| ⚫ | |||
| ⚫ | |||
| ⚫ | |||
| colspan="6" | — |
| colspan="6" | — |
||
| − | | colspan="2" |{{CTRNF Mugshot|image=neon_clown_decal.png|px=50|rarity=legendary}} |
+ | | colspan="2" |{{CTRNF Mugshot|image=neon_clown_decal.png|px=50|rarity=legendary}}<br />{{iconGP|Neon Circus}} Neon Clown |
|- |
|- |
||
| + | ! style="text-align:center;"|Nitro Bumper |
||
| colspan="2" | — |
| colspan="2" | — |
||
| colspan="3" |{{CTRNF Mugshot|image=mall_ride_decal.png|px=50|rarity=exotic}}<br /><small>Nitro Bumper</small><br />{{iconGP|Neon Circus}} Mall Ride |
| colspan="3" |{{CTRNF Mugshot|image=mall_ride_decal.png|px=50|rarity=exotic}}<br /><small>Nitro Bumper</small><br />{{iconGP|Neon Circus}} Mall Ride |
||
| Line 697: | Line 728: | ||
===Decal Packs=== |
===Decal Packs=== |
||
| − | Decal Packs include a |
+ | Decal Packs include a decals for a specific kart. The one included in its related kart's set is never included. They were introduced in the ''Neon Circus'' Grand Prix to sell decals at a discount price. They all cost {{CTRNF-WC|1125}}. |
| + | <tabber> |
||
| ⚫ | |||
| + | Base game={| class="article-table mw-collapsible mw-collapsed" style="text-align:center;font-size:95%; width: 100%;" |
||
|- |
|- |
||
| − | ! style="text-align:center" | |
+ | ! style="text-align:center" | Decal Pack |
! style="text-align:center" colspan="2" | Items |
! style="text-align:center" colspan="2" | Items |
||
| + | |- |
||
| ⚫ | |||
| + | | rowspan="2" | [[File:cabrio_pack.png|x150px]]<br />Cabrio Decals |
||
| ⚫ | |||
| ⚫ | |||
| + | |- |
||
| + | | {{CTRNF Mugshot|image=paint splash_decal.png|rarity=basic|px=50}}<br /><small>Decal</small><br />Paint Splash<ref group=trivia name=trivia1>The Paint Splash decal for the Dragonfly kart is sold in this pack instead of the Paint Splashes decal for the Cabrio as seen on the pack icon.</ref> |
||
| + | | {{CTRNF Mugshot|image=wildstyle_decal.png|rarity=legendary|px=50}}<br /><small>Decal</small><br />Wildstyle |
||
| + | |- |
||
| + | | rowspan="2" | [[File:crikey_pack.png|x150px]]<br />Crikey Decals |
||
| + | | {{CTRNF Mugshot|image=expedition_decal.png|rarity=basic|px=50}}<br /><small>Decal</small><br />Expedition |
||
| ⚫ | |||
| + | |- |
||
| ⚫ | |||
| ⚫ | |||
| + | |- |
||
| + | | rowspan="2" | [[File:deadinator_pack.png|x150px]]<br />Deadinator Decals |
||
| ⚫ | |||
| ⚫ | |||
| + | |- |
||
| ⚫ | |||
| + | | {{CTRNF Mugshot|image=the lucky one_decal.png|rarity=legendary|px=50}}<br /><small>Decal</small><br />The Lucky One |
||
| + | |- |
||
| + | | rowspan="2" | [[File:Doom Buggy_pack.png|x150px]]<br />Doom Buggy Decals |
||
| ⚫ | |||
| + | | {{CTRNF Mugshot|image=galactic voyager_decal.png|rarity=exotic|px=50}}<br /><small>Decal</small><br />Galactic Voyager |
||
| + | |- |
||
| ⚫ | |||
| + | | {{CTRNF Mugshot|image=submerged_decal.png|rarity=legendary|px=50}}<br /><small>Decal</small><br />Submerged |
||
| + | |- |
||
| + | | rowspan="2" | [[File:imperium_pack.png|x150px]]<br />Imperium Decals |
||
| ⚫ | |||
| + | | {{CTRNF Mugshot|image=full of mud_decal.png|rarity=exotic|px=50}}<br /><small>Decal</small><br />Full of Mud |
||
| + | |- |
||
| ⚫ | |||
| + | | {{CTRNF Mugshot|image=stars n stripes_decal.png|rarity=legendary|px=50}}<br /><small>Decal</small><br />Stars & Stripes |
||
|- |
|- |
||
| rowspan="2" | [[File:roaster_pack.png|x150px]]<br />Roadster Decals |
| rowspan="2" | [[File:roaster_pack.png|x150px]]<br />Roadster Decals |
||
| − | | {{CTRNF Mugshot|image=two_tones_decal.png|rarity=basic|px=50}}<br /><small> |
+ | | {{CTRNF Mugshot|image=two_tones_decal.png|rarity=basic|px=50}}<br /><small>Decal</small><br />Two Tones |
| − | | {{CTRNF Mugshot|image=pure_nature_decal.png|rarity=exotic|px=50}}<br /><small> |
+ | | {{CTRNF Mugshot|image=pure_nature_decal.png|rarity=exotic|px=50}}<br /><small>Decal</small><br />Pure Nature |
| ⚫ | |||
|- |
|- |
||
| − | | {{CTRNF Mugshot|image=dots_n_spots_decal.png|rarity=exotic|px=50}}<br /><small> |
+ | | {{CTRNF Mugshot|image=dots_n_spots_decal.png|rarity=exotic|px=50}}<br /><small>Decal</small><br />Dots n' Spots |
| − | | {{CTRNF Mugshot|image=the_fish_decal.png|rarity=legendary|px=50}}<br /><small> |
+ | | {{CTRNF Mugshot|image=the_fish_decal.png|rarity=legendary|px=50}}<br /><small>Decal</small><br />The Fish |
| + | |- |
||
| + | | rowspan="2" | [[File:six-pipes_pack.png|x150px]]<br />Six-Pipes Decals |
||
| ⚫ | |||
| ⚫ | |||
| + | |- |
||
| ⚫ | |||
| ⚫ | |||
| + | |- |
||
| + | | rowspan="2" | [[File:trikee_pack.png|x150px]]<br />Trikee Decals |
||
| ⚫ | |||
| + | | {{CTRNF Mugshot|image=Boom_decal.png|rarity=exotic|px=50}}<br /><small>Decal</small><br />Boom! |
||
| + | |- |
||
| + | | {{CTRNF Mugshot|image=Lightspeed_decal.png|rarity=exotic|px=50}}<br /><small>Decal</small><br />Lightspeed |
||
| ⚫ | |||
| + | |} |
||
| + | |||
| + | |-|Nitro Tour={| class="article-table mw-collapsible mw-collapsed" style="text-align:center;font-size:95%; width: 100%;" |
||
| + | |- |
||
| + | ! style="text-align:center" | Decal Pack |
||
| + | ! style="text-align:center" colspan="2" | Items |
||
| + | |- |
||
| + | | rowspan="2" | [[File:bandibuggy_pack.png|x150px]]<br />Bandibuggy Decals |
||
| ⚫ | |||
| + | | {{CTRNF Mugshot|image=splinters_decal.png|rarity=exotic|px=50}}<br /><small>Decal</small><br />Splinters |
||
| + | |- |
||
| ⚫ | |||
| + | | {{CTRNF Mugshot|image=Rattlesnake_decal.png|rarity=legendary|px=50}}<br /><small>Decal</small><br />Rattlesnake |
||
| + | |- |
||
| + | | rowspan="2" | [[File:le chaux_pack.png|x150px]]<br />Le Chaux Decals |
||
| ⚫ | |||
| ⚫ | |||
| + | |- |
||
| ⚫ | |||
| + | | {{CTRNF Mugshot|image=Fiery eagle_decal.png|rarity=legendary|px=50}}<br /><small>Decal</small><br />Fiery Eagle |
||
| + | |- |
||
| + | | rowspan="2" | [[File:rocket_pack.png|x150px]]<br />Rocket Decals |
||
| ⚫ | |||
| + | | {{CTRNF Mugshot|image=fire_storm_decal.png|rarity=exotic|px=50}}<br /><small>Decal</small><br />Fire Storm |
||
| + | |- |
||
| ⚫ | |||
| ⚫ | |||
| + | |} |
||
| + | |||
| + | |-|Back N. Time={| class="article-table mw-collapsible mw-collapsed" style="text-align:center;font-size:95%; width: 100%;" |
||
| + | |- |
||
| + | ! style="text-align:center" | Decal Pack |
||
| + | ! style="text-align:center" colspan="2" | Items |
||
|- |
|- |
||
| rowspan="2" | [[File:probulot_pack.png|x150px]]<br />Probulot Decals |
| rowspan="2" | [[File:probulot_pack.png|x150px]]<br />Probulot Decals |
||
| − | | {{CTRNF Mugshot|image=future_highway_decal.png|rarity=basic|px=50}}<br /><small> |
+ | | {{CTRNF Mugshot|image=future_highway_decal.png|rarity=basic|px=50}}<br /><small>Decal</small><br />Future Highway |
| − | | {{CTRNF Mugshot|image=cool_zebra_decal.png|rarity=exotic|px=50}}<br /><small> |
+ | | {{CTRNF Mugshot|image=cool_zebra_decal.png|rarity=exotic|px=50}}<br /><small>Decal</small><br />Cool Zebra |
| ⚫ | |||
|- |
|- |
||
| − | | {{CTRNF Mugshot|image=80s_fashion_decal.png|rarity=exotic|px=50}}<br /><small> |
+ | | {{CTRNF Mugshot|image=80s_fashion_decal.png|rarity=exotic|px=50}}<br /><small>Decal</small><br />80's Fashion |
| − | | {{CTRNF Mugshot|image=pitfall_decal.png|rarity=legendary|px=50}}<br /><small> |
+ | | {{CTRNF Mugshot|image=pitfall_decal.png|rarity=legendary|px=50}}<br /><small>Decal</small><br />Pitfall! |
|- |
|- |
||
| rowspan="2" | [[File:nostalginator_pack.png|x150px]]<br />Nostalginator Decals |
| rowspan="2" | [[File:nostalginator_pack.png|x150px]]<br />Nostalginator Decals |
||
| − | | {{CTRNF Mugshot|image=bubbles_decal.png|rarity=basic|px=50}}<br /><small> |
+ | | {{CTRNF Mugshot|image=bubbles_decal.png|rarity=basic|px=50}}<br /><small>Decal</small><br />Funny Bubbles |
| − | | {{CTRNF Mugshot|image=floating_flowers_decal.png|rarity=exotic|px=50}}<br /><small> |
+ | | {{CTRNF Mugshot|image=floating_flowers_decal.png|rarity=exotic|px=50}}<br /><small>Decal</small><br />Floating Flowers |
| ⚫ | |||
|- |
|- |
||
| − | | {{CTRNF Mugshot|image=bed_time_decal.png|rarity=exotic|px=50}}<br /><small> |
+ | | {{CTRNF Mugshot|image=bed_time_decal.png|rarity=exotic|px=50}}<br /><small>Decal</small><br />Bed Time |
| − | | {{CTRNF Mugshot|image=bath_time_decal.png|rarity=legendary|px=50}}<br /><small> |
+ | | {{CTRNF Mugshot|image=bath_time_decal.png|rarity=legendary|px=50}}<br /><small>Decal</small><br />Bath Time |
|- |
|- |
||
| rowspan="2" | [[File:mammoth_pack.png|x150px]]<br />Mammoth Decals |
| rowspan="2" | [[File:mammoth_pack.png|x150px]]<br />Mammoth Decals |
||
| − | | {{CTRNF Mugshot|image=jungle_stripes_decal.png|rarity=basic|px=50}}<br /><small> |
+ | | {{CTRNF Mugshot|image=jungle_stripes_decal.png|rarity=basic|px=50}}<br /><small>Decal</small><br />Jungle Stripes |
| − | | {{CTRNF Mugshot|image=crude_kraken_decal.png|rarity=exotic|px=50}}<br /><small> |
+ | | {{CTRNF Mugshot|image=crude_kraken_decal.png|rarity=exotic|px=50}}<br /><small>Decal</small><br />Crude Kraken |
| ⚫ | |||
|- |
|- |
||
| − | | {{CTRNF Mugshot|image=Prehistoric_patterns.png|rarity=exotic|px=50}}<br /><small> |
+ | | {{CTRNF Mugshot|image=Prehistoric_patterns.png|rarity=exotic|px=50}}<br /><small>Decal</small><br />Prehistoric Patterns |
| − | | {{CTRNF Mugshot|image=war_paint_decal.png|rarity=legendary|px=50}}<br /><small> |
+ | | {{CTRNF Mugshot|image=war_paint_decal.png|rarity=legendary|px=50}}<br /><small>Decal</small><br />War Paint |
| + | |}</tabber> |
||
| ⚫ | |||
===Wheels=== |
===Wheels=== |
||
| Line 986: | Line 1,095: | ||
[[File:Glicthed dino pack.jpg|thumb|200px|The glitched Sticker Pack at the start of the 3rd Grand Prix.]] |
[[File:Glicthed dino pack.jpg|thumb|200px|The glitched Sticker Pack at the start of the 3rd Grand Prix.]] |
||
*The Dino Pack which contains the Fake Ptero Head and Fake Triceratops Head stickers was glitched out of the Pit Stop during the ''Back N. Time'' Grand Prix. It can appear in the Pit Stop but cannot be bought. As such, those stickers were unobtainable until the [[Grand Prix/Neon Circus|Neon Circus]] [[Grand Prix]]. |
*The Dino Pack which contains the Fake Ptero Head and Fake Triceratops Head stickers was glitched out of the Pit Stop during the ''Back N. Time'' Grand Prix. It can appear in the Pit Stop but cannot be bought. As such, those stickers were unobtainable until the [[Grand Prix/Neon Circus|Neon Circus]] [[Grand Prix]]. |
||
| + | <references group="trivia"/> |
||
{{Crash Team Racing Nitro-Fueled}} |
{{Crash Team Racing Nitro-Fueled}} |
||
Revision as of 15:07, 24 November 2019

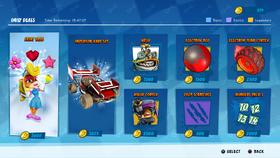
The Pit Stop is the in-game rotary shop where characters, skins, decals, karts, wheels and paint jobs can be bought using Wumpa Coins in Crash Team Racing: Nitro-Fueled. It consist of two bundle slots of discounted items and six slots for packs and individual items.
Items displayed on this page represent what is currently available from the Pit Stop. Unavailable items and packs can be found on their respective Grand Prix page.
Overview
At the start of every day (12:00AM UTC), the Pit Stop refreshes with set new deals occupying each of the slots. If a player has already bought one of the deals, then a new one takes its place, until one that the player has not bought shows up. Bundle slots can only contain bundle deals, while non-bundle slots can contain everything else. Sticker packs, which may contain paint jobs, are always in non-bundle slots.
Availability
Deals and individual items may be GP Limited, meaning they are exclusive to the on-going Grand Prix and will only be available in the store during its duration with a few days of extra time. Only a select few GP Limited deals are available each day, taking priority over regular deals and are therefore deals that cannot be made to appear through buying another deal. GP Limited deals and items are marked with the symbol of their corresponding Grand Prix next to their prices or names in the table below.
Character bundles have all been limited in time so far, with Summer Time and Fairy Tale bundles made available at the game's launch that were removed from the Pit Stop with debut of the first Grand Prix.
Some limited items were added back permanently to the Pit Stop at the start of a subsequent Grand Prix :
![]() Back N. Time :
Back N. Time :
- all items from the "Summer Time" and the "Fairy Tale" bundles, except "Life Saver N. Trance".
- all Nitro Tour paint jobs, except character and kart specific paint jobs: "Ami Green'", '"Megumi White'", "Liz Violet", "Isabella Blue", "Tawna Pink", "Bandibuggy Green", "Rocket Blue" and "Le Chaux Yellow".
![]() Spooky :
Spooky :
- all remaining items from Nitro Tour, except the country flags, the 4 Egyptian-themed and the 4 Nitro Team Numbers stickers.
- on October 10 (October 14 for the Nintendo Switch), an update brought back "Life Saver N. Trance".
![]() Neon Circus :
Neon Circus :
- all remaining items from Back N. Time, some in new bundles
- new bundles for already re-added skins from the base game and from Nitro Tour were added.
- Decal Packs for decals from all karts from the Base Game, Nitro Tour, and Back N. Time.
Deals
Most bundles feature items discounted to a percentage of the sum of their items' value. Some of these items can be bought separately at full price. Items already owned are discounted of their value in bundles.
Items and Bundles which are listed below with a Grand Prix icon means that they are only available in the current Grand Prix.
With new items being added and de-added every month (without counting Last Chance Bundles and Nitros Oxide Edition early unlocks), the total minimum cost of buying everything in the pit stop has changed quite a lot over time :
- At the release of the game, it was
 200025.
 - At the start of the Nitro Tour GP, it was 280325.
- At the start of the Back N. Time GP, it was 273125
- At the start of the [[File:|20px]] Spyro N. Friends GP, it was 275950
- At the start of the Spooky GP, it was 362525
- At the release of the October 10 (or 14) update, it was 381975
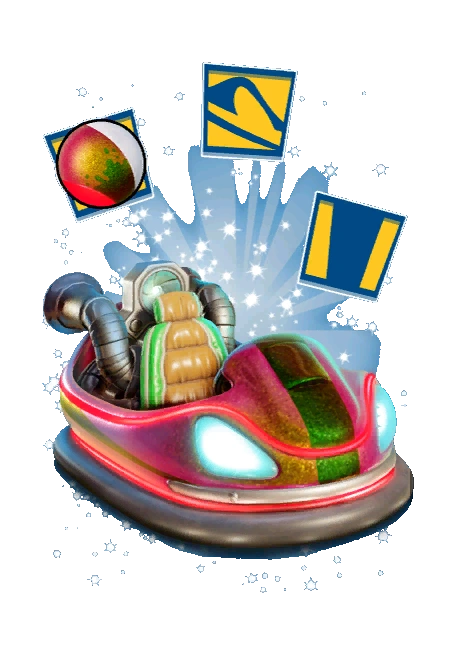
Last Chance
Last Chances are bundles containing all Nitro Gauge rewards of a Grand Prix. They have the same cost as the Nitro Fill Up option available at the end of a Grand Prix, meaning it will be priced according to how many Nitro points a player was lacking. They are only available during the first week of the following Grand Prix. As an exception, the Spyro N. Friends bundle was also available during the fist week of Neon Circus.
| Last Chance | Items | Wumpa Coins |
|---|---|---|
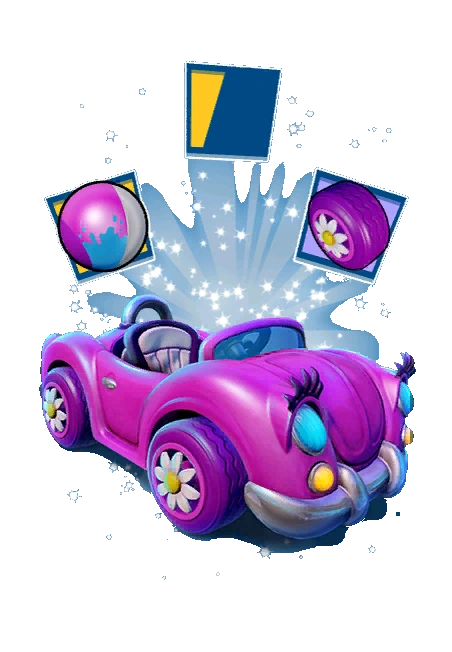
 Spyro N. Friends Bundle |
 Items Detail |
|
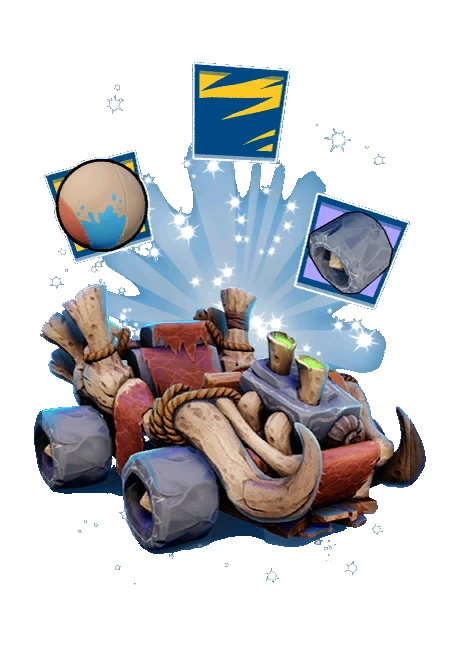
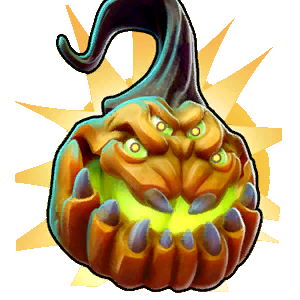 Spooky Bundle |
 Items Detail |
Character Bundles
Character Bundles contain at least one Character or Character Skin. They also contain other items for most such as Paint Jobs, Decals, Wheels or Stickers. Bundles with four skins are discount at 25% of their value. Other Bundles are discounted at 10% of their value.
| Bundle | Items | Wumpa Coins | |
|---|---|---|---|
 Summer Time |
 Character Skin Beach Dingodile |
Character Skin Life Saver N. Trance |
(Unobtainable since the first GP) |
 Character N. Trance |
 Paint Job Iridescent Blue | ||
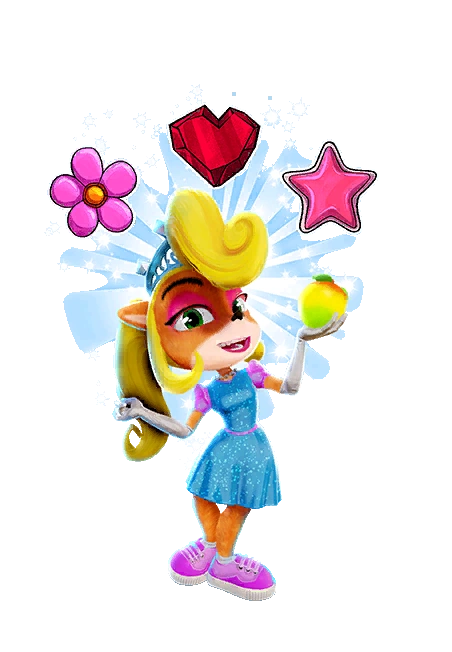 Fairy Tale |
 Character Skin Princess Coco |
  Sticker Flower |
(Unobtainable since the first GP) |
 Sticker Heart |
 Sticker Star | ||
 Beach Time |
Character Skin Scuba Crash |
 Character Skin Beach Coco |
|
Character Skin Beach Dingodile |
Character Skin Life Saver N. Trance | ||
| Bundle | Items | Wumpa Coins | |
|---|---|---|---|
 Tawna |
Character Tawna |
Character Skin Motorsport Tawna |
|
 Sticker Tawna |
 Character Skin Tawna Pink | ||
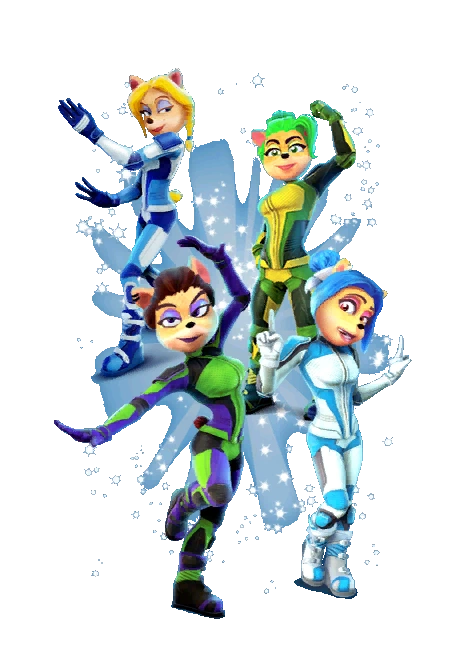 Motorsport Squad |
Character Skin Motorsport Ami |
Character Skin Motorsport Megumi |
|
Character Skin Motorsport Liz |
Character Skin Motorsport Isabella | ||
| Bundle | Items | Wumpa Coins | |
|---|---|---|---|
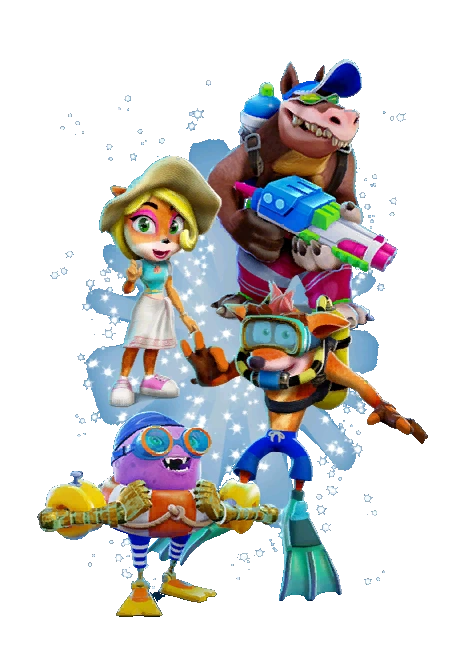
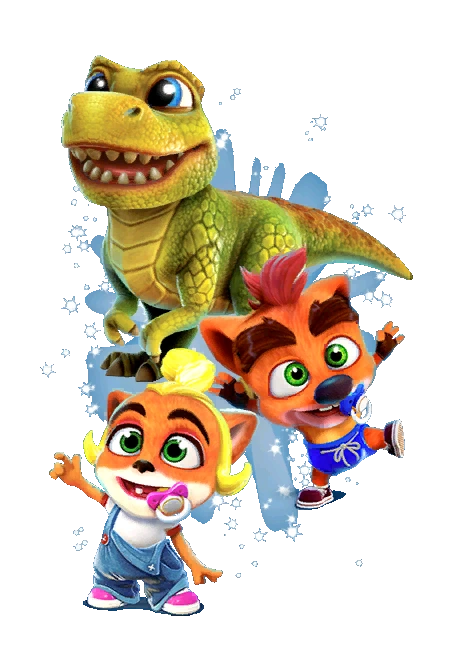 Cute Babies |
 Character Baby Crash |
 Character Skin Baby Coco |
|
 Character Baby T | |||
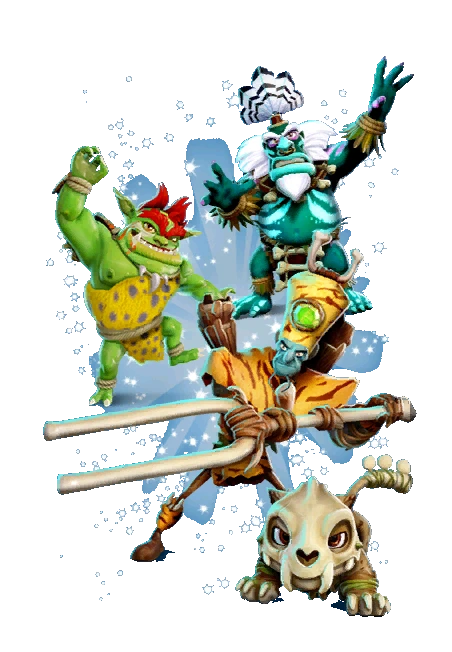 Stone Age |
Character Skin |
Character Skin Stone Age N.Tropy |
|
Character Skin Jurassic Krunk |
Character Skin Caveman Zem | ||
| Bundle | Items | Wumpa Coins | |
|---|---|---|---|
 Ebenezer Von Clutch |
 Character Ebenezer Von Clutch |
 Wheels Neon Red |
|
 Paint Job Sparkling Green & Purple |
 Sticker Ebenezer Von Clutch | ||
 Pasadena O'Possum |
 Character Pasadena O'Possum |
 Wheels Neon Pink |
|
 Paint Job Sparkling Blue |
 Sticker Pasadena O'Possum | ||
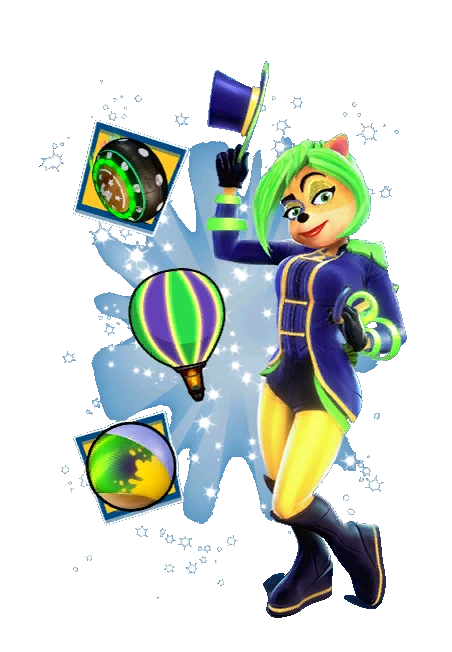 Circus Athletes: Ami |
 Character Skin Circus Ami |
 Wheels Neon Green |
|
 Paint Job Neon Green & Yellow |
 Sticker Neon Blimp | ||
 Circus Athletes: Megumi |
 Character Skin Circus Megumi |
 Wheels Neon Rainbow |
|
 Paint Job Neon Blue & Yellow |
 Sticker Neon Dragoncoaster | ||
 Circus Athletes: Isabella |
 Character Skin Circus Isabella |
 Wheels Neon Aqua |
|
 Paint Job Neon Purple & Aqua |
 Sticker Stars | ||
 Circus Athletes: Liz |
 Character Skin Circus Liz |
 Wheels Neon Purple |
|
 Paint Job Neon Purple & Pink |
 Sticker Neon Guitar | ||
 Cannonball |
 Character Skin Cannonball Nash |
 Wheels Neon Blue |
|
 Paint Job Blue & White Stars |
  Sticker Cannon | ||
 The Clown |
 Character Skin Clown Cortex |
 Wheels Neon Orange |
|
 Paint Job Neon Red & Yellow |
 Sticker Balloon | ||
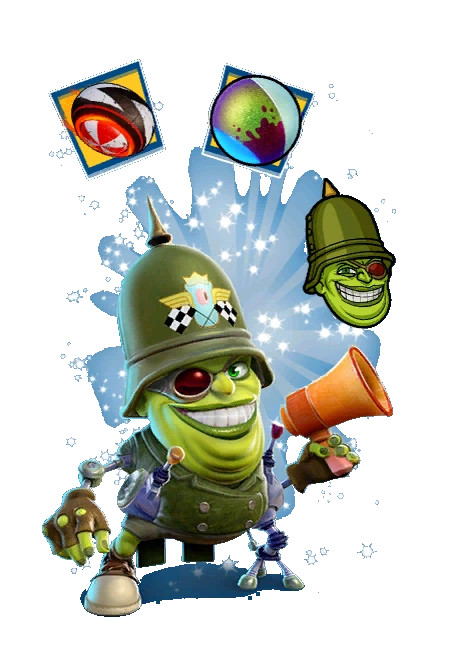
 Agricultural Fair |
 Character Skin Rustic Fake Crash |
 Character Skin Farmer N. Gin |
|
 Paint Job Wood | |||
| Bundle | Items | Wumpa Coins | |
|---|---|---|---|
 Bikers |
Character Skin Biker Crash |
Character Skin Tiny Biker |
|
Character Skin Dirtbike Crunch | |||
 Villains Hobbies |
Character Skin Football Tiny |
Character Skin Ballerina N.Gin |
|
Character Skin Painter Dingodile | |||
Kart Sets
Kart Sets usually contain a Kart Body, its corresponding Paint Job and Wheels as well as a Decal.
| Kart Sets | Items | Wumpa Coins | |
|---|---|---|---|
 Cabrio Kart Set |
 Kart Body Cabrio |
 Wheels Cabrio |
|
 Paint Job Cabrio Yellow |
 Decal Single Stripe | ||
 Crikey Kart Set |
 Kart Body Crikey |
 Wheels Crikey |
|
 Paint Job Crikey Yellow |
 Decal Tiger Stripes | ||
 Deadinator Kart Set |
 Kart Body Deadinator |
 Wheels Deadinator |
|
 Paint Job Deadinator Purple |
 Decal Low Rider | ||
 Doom Buggy Kart Set |
 Kart Body Doom Buggy |
 Wheels Doom Buggy |
|
 Paint Job Doom Buggy Grey |
 Decal Curved Stripes | ||
 Imperium Kart Set |
 Kart Body Imperium |
 Wheels Imperium |
|
 Paint Job Imperium Red |
 Decal Racer | ||
 Roadster Kart Set |
 Kart Body Roadster |
 Wheels Roadster |
|
 Paint Job Roadster Pink |
 Decal Lone Star | ||
 Six Pipes Kart Set |
 Kart Body Six Pipes |
 Wheels Six Pipes |
|
 Paint Job Six Pipes Red |
 Decal Hot Rod | ||
 Trikee Kart Set |
 Kart Body Trikee |
 Wheels Trikee |
|
 Paint Job Trikee Orange |
 Decal The Equalizer | ||
| Kart Sets | Items | Wumpa Coins | |
|---|---|---|---|
 Le Chaux Kart Set |
 Kart Body Le Chaux |
 Wheels Le Chaux |
|
 Paint Job Le Chaux Yellow |
 Decal Contour | ||
 Bandibuggy Kart Set |
 Kart Body Bandibuggy |
 Wheels Bandibuggy |
|
 Paint Job Bandibuggy Green |
 Decal Spots | ||
 Rocket Kart Set |
 Kart Body Rocket |
 Wheels Rocket |
|
 Paint Job Rocket Blue |
 Decal Checkerboard | ||
| Kart Sets | Items | Wumpa Coins | |
|---|---|---|---|
 Probulot Kart Set |
 Kart Body Probulot 2000 |
 Paint Job Probulot 2000 Teal |
|
 Decal Side Stripes | |||
 Nostalginator Kart Set |
 Kart Body Nostalginator |
 Wheels Nostalginator |
|
 Paint Job Nostalginator Pink |
 Decal Two Tones | ||
 Mammoth Kart Set |
 Kart Body Mammoth |
 Wheels Mammoth |
|
 Paint Job Mammoth Brown |
 Decal Primal Splash | ||
| Kart Sets | Items | Wumpa Coins | |
|---|---|---|---|
 Nitro Bumper Kart Set |
 Kart Body Nitro Bumper |
 Wheels Nitro Bumper Sparkling Red |
|
 Decal Stripes |
 Decal Clown Buggy | ||
Characters
Characters in the Pit Stop are priced ![]() 1500 each.
1500 each.
Crunch Bandicoot |
 Krunk |
Small Norm |
 Big Norm |
Nash |
N. Trance |
Real Velo |
 Geary |
Zam |
Zem |
Tawna |
Ami |
Megumi |
Liz |
Isabella |
 Baby Crash |
 Baby Coco |
 Baby T |
 |
 |
Character Skins
Character skins are priced ![]() 2500.
2500.
Scuba Crash |
Biker Crash |
Mad Scientist Crash |
|
Ninja Cortex |
Robo Cortex |
Pharaoh Cortex |
|
General Tiny |
Football Tiny |
Tiny Biker |
Tiny Gladiator |
Princess Coco |
Beach Coco |
||
Ballerina N.Gin |
Chef N.Gin |
Crash Test Dummy N.Gin |
|
Hazmat Dingodile |
Beach Dingodile |
Painter Dingodile |
|
Fisherman Polar |
|||
Musketeer Pura |
Sabertooth Pura |
||
Penta Ninja |
|||
Gentleman Ripper Roo |
Mad Scientist Ripper Roo |
||
Komodo Khan |
|||
Gangster Pinstripe |
|||
Cowboy Fake Crash |
Dashing Fake Crash |
|
|
Shower Cap Nitros Oxide |
|||
Stone Age N. Tropy |
|||
Dirt Bike Crunch |
Racer Crunch |
||
Jurassic Krunk |
|||
|
|||
Life Saver N. Trance |
Wooden Doll N. Trance |
||
Bulldog Zam |
|||
Punk Zem |
Caveman Zem |
||
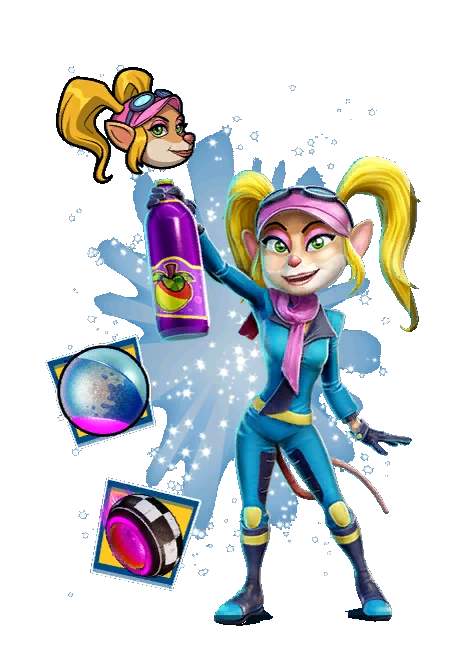
Motorsport Tawna |
|||
Motorsport Ami |
|
||
Motorsport Megumi |
|
||
Motorsport Liz |
|
||
Motorsport Isabella |
|
||
Fake Baby T |
Paint Jobs
Paint Jobs tend to be priced based on their tier:
- Exotic: 750
- Legendary: 1500
There have been exceptions, however, such as the ![]() Quartz and
Quartz and ![]() Obsidian Paint Jobs, which are priced
Obsidian Paint Jobs, which are priced ![]() 750 like an Exotic Paint Job.
750 like an Exotic Paint Job.
- The following Paint Jobs are priced 750.
 Blue & Yellow |
 Blue, White & Red |
 Blue, Red & White |
 Liz Violet |
Tawna Pink |
 Red & White |
 Red, Blue & White |
 Red, White & Blue |
 Red & Yellow |
|
 Yellow, Black & Red |
 Yellow, Blue & Red |
 Yellow, Green & Blue |
 Ami Green |
 Green, White & Red |
 Green, White & Orange |
 Green, Yellow & Red |
 Pastel |
 Isabella Blue |
 Megumi White |
 White, Red & Green |
 White & Red |
 White, Red & Blue |
White & Blue |
 Black, Yellow & Red |
|
|
 Quartz |
 Obsidian | |
- The following Paint Jobs are priced 1500.
| Electron | Iridescent | |||
|---|---|---|---|---|
 Electron Blue |
Iridescent Blue |
| ||
 Electron Aqua |
— | | ||
 Electron Green |
— | | ||
 Electron Orange |
 Iridescent Orange |
— | ||
 Electron Pink |
— | | ||
 Electron Purple |
 Iridescent Purple |
- | ||
 Electron Red |
 Iridescent Red |
| ||
 Electron Yellow |
— | - | ||
Decals
Decals are priced according to tiers:
- Basic: 250
- Exotic: 500
- Legendary: 1000
| Kart | Basic | Exotic | Legendary | |||||||
|---|---|---|---|---|---|---|---|---|---|---|
| Classic | — |  Raining Hearts |
— | |||||||
| Team Bandicoot | — |  Digital Fire |
 Ancient Pattern | |||||||
| Team Trance | — |  Evening Shade |
 High Tech Two | |||||||
| Team Cortex | — |  Deep Scratches |
— | |||||||
| Team Oxide | — |  Web of Oxide |
 Motherboard |
 Cosmic Sky | ||||||
| Hovercraft | — |  Intergalactic Flames |
 Sunrays |
 Gasmoxian Style |
 Sea of Fury | |||||
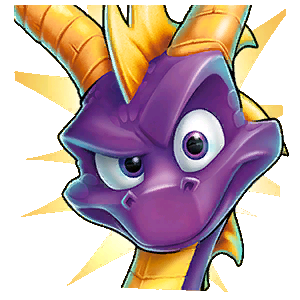
| Cabrio | — | — |  The Dragon | |||||||
| Roadster | — | — |  Tropical Sunset | |||||||
| Daredevil |  |
 |
 |
— | ||||||
| Pressurizer |  |
— |  | |||||||
| Nitro Bumper | — |  Nitro Bumper |
 Nitro Bumper |
 Nitro Bumper | ||||||
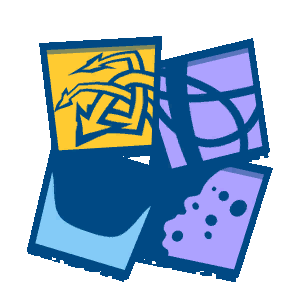
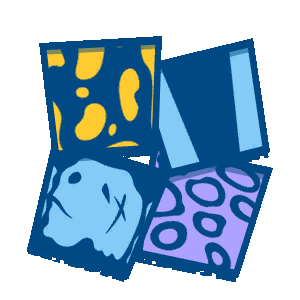
Decal Packs
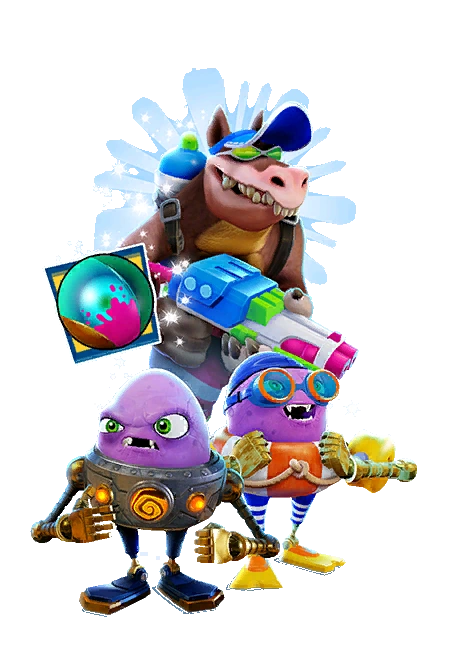
Decal Packs include a decals for a specific kart. The one included in its related kart's set is never included. They were introduced in the Neon Circus Grand Prix to sell decals at a discount price. They all cost ![]() 1125.
1125.
| Decal Pack | Items | |
|---|---|---|
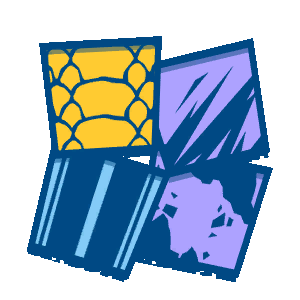
 Cabrio Decals |
 Decal Roadtrip |
 Decal Flying Ribbons |
 Decal Paint Splash[trivia 1] |
 Decal Wildstyle | |
 Crikey Decals |
 Decal Expedition |
 Decal Mark of Hunters |
 Decal Giraffe Spots |
 Decal Camouflage | |
 Deadinator Decals |
 Decal Taxi |
 Decal Royal Flush |
 Decal Shark Attack |
 Decal The Lucky One | |
 Doom Buggy Decals |
 Decal Sea Reef |
 Decal Galactic Voyager |
 Decal The Kraken |
 Decal Submerged | |
 Imperium Decals |
 Decal Fiery Flash |
 Decal Full of Mud |
 Decal Comics Art |
 Decal Stars & Stripes | |
 Roadster Decals |
 Decal Two Tones |
 Decal Pure Nature |
 Decal Dots n' Spots |
 Decal The Fish | |
 Six-Pipes Decals |
 Decal Bottom Line |
 Decal Bling Bling |
 Decal Rippin' Raptor |
 Decal Skulls and Bones | |
 Trikee Decals |
 Decal Checkered Line |
 Decal Boom! |
 Decal Lightspeed |
 Decal Fish Scales | |
| Decal Pack | Items | |
|---|---|---|
 Bandibuggy Decals |
 Decal Twin Bands |
 Decal Splinters |
 Decal Avalanche |
 Decal Rattlesnake | |
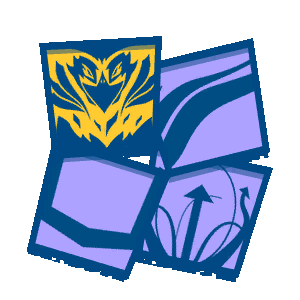 Le Chaux Decals |
 Decal Pinnacle |
 Decal Split Wave |
 Decal Flowing Arrows |
 Decal Fiery Eagle | |
 Rocket Decals |
 Decal Classic Stripes |
 Decal Fire Storm |
 Decal Squared |
 Decal Winged Crown | |
| Decal Pack | Items | |
|---|---|---|
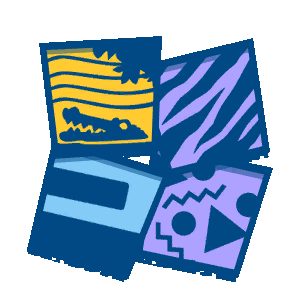 Probulot Decals |
 Decal Future Highway |
 Decal Cool Zebra |
 Decal 80's Fashion |
 Decal Pitfall! | |
 Nostalginator Decals |
 Decal Funny Bubbles |
 Decal Floating Flowers |
 Decal Bed Time |
 Decal Bath Time | |
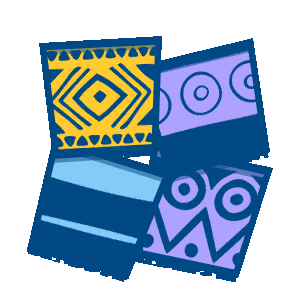 Mammoth Decals |
 Decal Jungle Stripes |
 Decal Crude Kraken |
 Decal Prehistoric Patterns |
 Decal War Paint | |
Wheels
The available separate Wheels are all in the Legendary tier and priced ![]() 2500.
2500.
| Electron | ||||
|---|---|---|---|---|
 Electron Team Bandicoot |
 Twilight Blue |
 Blue Lava Rock |
| |
 Electron Doom Buggy |
 Twilight Aqua |
 Aqua Lava Rock |
| |
 Electron Team Oxide |
 Twilight Green |
 Green Lava Rock |
| |
 Electron Trikee |
 Twilight Orange |
 Orange Lava Rock |
| |
 Electron Roadster |
 Twilight Pink |
 Pink Lava Rock |
| |
 Electron Deadinator |
 Twilight Purple |
 Purple Lava Rock |
| |
 Electron Team Cortex |
 Twilight Red |
 Red Lava Rock |
| |
 Electron Team Trance |
 Twilight Yellow |
 Yellow Lava Rock |
— | |
| — | | |||
Sticker Packs
Sticker Packs contain 2 to 4 stickers per pack, and are priced based on not only the amount of Stickers inside, but also on the tier of each Sticker the pack offers:
- Basic: 250
- Exotic: 500
- Legendary: 1000
A Sticker Pack containing four Basic stickers amounts to ![]() 1000, whereas a Sticker Pack containing three Legendary stickers costs
1000, whereas a Sticker Pack containing three Legendary stickers costs ![]() 3000. Sticker Packs are notably the only Bundle deals that generally do not offer a discount.
3000. Sticker Packs are notably the only Bundle deals that generally do not offer a discount.
| Sticker Pack | Items | Wumpa Coins | |
|---|---|---|---|
 Numbers Pack 1 |
 Sticker Ten |
 Sticker Twelve |
|
 Sticker Thirteen |
 Sticker Fourteen | ||
 Numbers Pack 2 |
 Sticker Seventy Five |
 Sticker Seventy Six |
|
 Sticker Seventy Eight |
 Sticker Seventy Nine | ||
 Numbers Pack 3 |
 Sticker Ninety Five |
 Sticker Ninety Six |
|
 Sticker Ninety Seven |
 Sticker Ninety Eight | ||
 Numbers Pack 4 |
 Sticker Double Zero |
 Sticker Twenty Two |
|
 Sticker Thirty Three | |||
 Numbers Pack 5 |
 Sticker Forty Four |
 Sticker Fifty-Five |
|
 Sticker Seventy-Seven | |||
 CNK Racers |
 Sticker N.Trance |
 Sticker Zam |
|
 Sticker Zem | |||
 Velo's Henchmen |
 Sticker Big Norm |
 Sticker Small Norm |
|
 Sticker Real Velo | |||
 Hazard Pack 1 |
 Sticker Exclamation |
 Sticker Question |
|
 Sticker TNT Crate |
 Sticker Nitro Crate | ||
 Hazard Pack 2 |
 Sticker Shock |
 Sticker Poison |
|
 Sticker Flammabke |
 Sticker Radioactive | ||
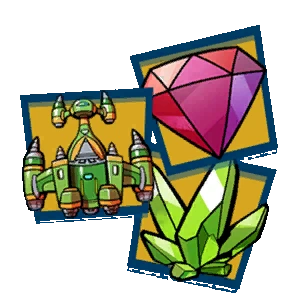 Gemstone Valley Pack |
 Sticker Crystals |
 Sticker Gem |
|
 Sticker Oxide Spaceship | |||
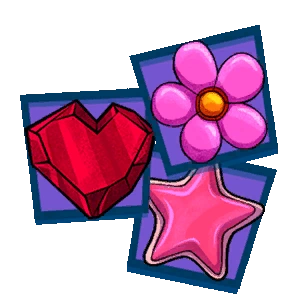 Feel Good Pack |
Sticker Flower |
Sticker Heart |
|
Sticker Star | |||
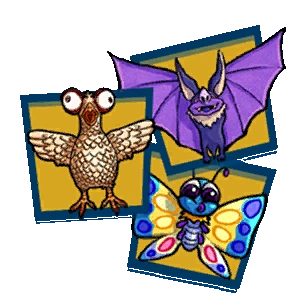 Little Critters Pack |
 Sticker Bat |
 Sticker Butterfly |
|
 Sticker Chicken | |||
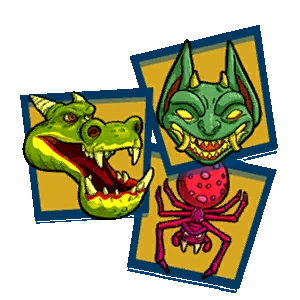 Monsters Pack |
 Sticker Dragon |
 Sticker Gargoyle |
|
 Sticker Spider | |||
| Sticker Pack | Items | Wumpa Coins | |
|---|---|---|---|
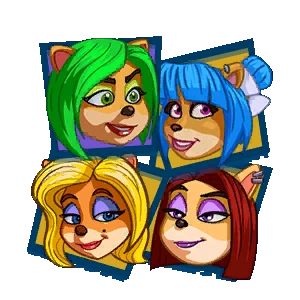 Nitro Team |
 Sticker Ami |
 Sticker Isabella |
|
 Sticker Liz |
 Sticker Megumi | ||
 Tawna Portrait |
Sticker Tawna |
||
| Sticker Pack | Items | Wumpa Coins | |
|---|---|---|---|
 Cave Paintings Pack |
 Sticker Cave Painting of Tiny |
 Sticker Cave Painting of Bones |
|
 Sticker Cave Painting of T-Rex Chicken |
 Sticker Cave Painting of Fake Caveman | ||
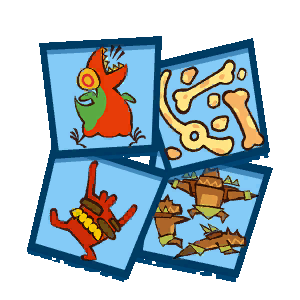
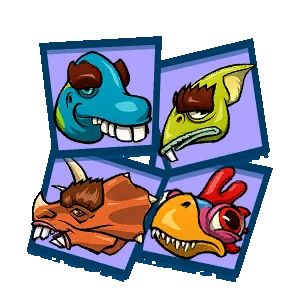 Dino Pack |
 Sticker Fake Brontosaurus Head |
 Sticker Fake Ptero Head |
|
 Sticker Fake Triceratops Head |
 Sticker T-Rex Chicken Head | ||
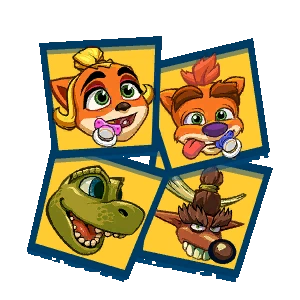 Back N. Time Portraits |
 Sticker Caveman Fake Crash |
 Sticker Baby T |
|
 Sticker Baby Coco |
 Sticker Baby Crash | ||
| Sticker Pack | Items | Wumpa Coins | |
|---|---|---|---|
 Rising Star Pack |
Sticker Stars |
Sticker Neon Guitar |
|
 Sticker Neon Dragoncoaster |
Sticker Pasadena O'Possum | ||
 Flying Pack |
 Sticker Neon Blimp |
Sticker Cannon |
|
Sticker Balloon |
Sticker Ebenezer Von Clutch | ||
Color Sets
Color Sets only appeared during the Nitro Tour Grand Prix. They contain an exotic Paint Job each with one or three country flag Stickers, which are tiered Legendary.
Trivia

The glitched Sticker Pack at the start of the 3rd Grand Prix.
- The Dino Pack which contains the Fake Ptero Head and Fake Triceratops Head stickers was glitched out of the Pit Stop during the Back N. Time Grand Prix. It can appear in the Pit Stop but cannot be bought. As such, those stickers were unobtainable until the Neon Circus Grand Prix.
- ↑ The Paint Splash decal for the Dragonfly kart is sold in this pack instead of the Paint Splashes decal for the Cabrio as seen on the pack icon.