HarmonyBunny (talk | contribs) (→Trivia) |
No edit summary |
||
| (34 intermediate revisions by 15 users not shown) | |||
| Line 1: | Line 1: | ||
{{Infobox Crash Bandicoot level |
{{Infobox Crash Bandicoot level |
||
| − | | |
+ | |name = Night Fight |
| − | | |
+ | |image =<gallery>Nightfight2.png|Original |
| + | Night Fight Remastered.jpg|N. Sane Trilogy</gallery> |
||
| − | | |
+ | |number = 23 (Warp Room 5) |
| − | | |
+ | |crates = 46 (29 in bonus, 2 on Death Route) |
| − | | gem =Power Crystal, Clear Gem (x2) |
||
| + | |gems = {{icon|crystal}} {{icon|cleargem}} {{icon|cleargem}} |
||
| ⚫ | |||
| + | |developertime=1:02.25 |
||
| − | | next=[[Pack Attack]] |
||
| + | |hint=Friendly fireflies will help light your way. |
||
| ⚫ | }}'''Night Fight''' (まっくら クラッシュ lit. ''Pitch-dark Crash'' in Japanese) is the twenty-third level and is the third level of the fifth warp room in [[Crash Bandicoot 2: Cortex Strikes Back |
||
| + | |relictimes = {{icon|sapphire}}: 1:45.00<br/>{{icon|gold}}: 1:10.98<br/>{{icon|platinum}}: 1:04.49 |
||
| ⚫ | |||
| ⚫ | |next = [[Pack Attack]]}}'''Night Fight''' (まっくら クラッシュ lit. ''Pitch-dark Crash'' in Japanese) is the twenty-third level and is the third level of the fifth warp room in ''[[Crash Bandicoot 2: Cortex Strikes Back]]'' and the ''[[Crash Bandicoot N. Sane Trilogy]]'' remaster of the second game. Unlike previous jungle levels, it is set during the night and [[Crash Bandicoot (character)|Crash]] can't see much without the assistance of [[firefly|fireflies]] scattered throughout the level. Each firefly's light only lasts for a limited time, so players must make haste in traversing the level, so they won't be left to navigate pure pitch blackness. Enemies include possums, lizards, and [[Spiked Saucer|spiked saucers]]. |
||
| − | The level design itself is a mostly straightforward affair, complicated slightly by a split path after the first [[Checkpoint Crate|checkpoint]]. The right path continues the main level path, but |
+ | The level design itself is a mostly straightforward affair, complicated slightly by a split path after the first [[Checkpoint Crate|checkpoint]]. The right path continues the main level path, but the left path is a [[Death Route|death route]], both of which contain crates. |
| + | |||
| − | ==Types of crates== |
||
| + | Unlike the other death routes in the game, this one can be accessed through normal means where the paths rejoin. The easiest way to get the crate gem is to take the right path, and then at the end where the two paths rejoin, backtrack a bit on the left path until the player reaches the two crates and, conveniently, a firefly will be waiting. The easiest way to get both gems in the same run is to take the death route platform and collect the death route gem, death warp to the last checkpoint then take the right path, get the crates from the back of the death route and it's as you were for the crate gem. |
||
| − | *[[Aku Aku Crate]] |
||
| + | |||
| − | *[[Basic Crate]] |
||
| − | + | The bonus round also has fireflies in it. |
|
| − | *[[Checkpoint Crate]] |
||
| − | *[[Crash Crate]] (bonus round only) |
||
| − | *[[Nitro Crate]] |
||
| − | *[[Nitro Switch Crate]] |
||
| − | *[[? Crate]] |
||
==Walkthrough== |
==Walkthrough== |
||
<gallery> |
<gallery> |
||
| + | Crash Bandicoot 2 Beta, Part 31 Night Fight-0 |
||
Night Flight - Both Clear Gems - Crash Bandicoot 2 Cortex Strikes Back - 100% Playthrough (Part 30) |
Night Flight - Both Clear Gems - Crash Bandicoot 2 Cortex Strikes Back - 100% Playthrough (Part 30) |
||
Crash Bandicoot 2 "N. Sane Trilogy" Night Fight (Box Gem Walkthrough) 1080 HD |
Crash Bandicoot 2 "N. Sane Trilogy" Night Fight (Box Gem Walkthrough) 1080 HD |
||
| Line 36: | Line 35: | ||
nightfight6.png |
nightfight6.png |
||
nightfight7.png |
nightfight7.png |
||
| + | Nightfight.png |
||
nightfight8.png |
nightfight8.png |
||
nightfight9.png |
nightfight9.png |
||
night fight level icon.png|Level icon from the load/save screen |
night fight level icon.png|Level icon from the load/save screen |
||
| + | Night Fight Remastered.png|Remastered level |
||
| ⚫ | |||
| + | Night Fight Save.|Icon from N. Sane Trilogy Save/Load Screen |
||
</gallery> |
</gallery> |
||
==Translation of Aku Aku Hints in the Japanese Version== |
==Translation of Aku Aku Hints in the Japanese Version== |
||
| − | |||
*If you have got the [[Green Gem|green diamond]], why don't you go to the [[Ruination|Ruins of Mechanism]]? I should have said that. |
*If you have got the [[Green Gem|green diamond]], why don't you go to the [[Ruination|Ruins of Mechanism]]? I should have said that. |
||
==Trivia== |
==Trivia== |
||
| − | *This is one of only four levels in the Crash platforming series from Crash 2 onwards that has more crates on the bonus path than the main path, the others being [[Ruination]] and [[Spaced Out]], also from Crash 2, and [[Drip, Drip, Drip]] from [[Crash Bandicoot: The Huge Adventure]]. |
+ | *This is one of only four levels in the Crash platforming series from ''Crash 2'' onwards that has more crates on the bonus path than the main path, the others being [[Ruination]] and [[Spaced Out]], also from ''Crash 2'', and [[Drip, Drip, Drip]] from ''[[Crash Bandicoot: The Huge Adventure]]''. |
*The name of the level is a word swap on the video game series "[[Wikipedia:Fight Night|Fight Night]]". |
*The name of the level is a word swap on the video game series "[[Wikipedia:Fight Night|Fight Night]]". |
||
**It may also refer to the word "night light". |
**It may also refer to the word "night light". |
||
| − | *This is |
+ | *This is the first level to feature fireflies. However, this is dependant on whether the player takes the secret warp to [[Totally Fly]] in [[Hangin' Out]], which in this case it isn't. |
| + | **Either way, this is chronologically the first level to feature fireflies, the second being Totally Fly. |
||
*The [[Extra Boxes Glitch|extra boxes glitch]] can be done in this level, but it requires the player to sacrifice 2 masks in the bonus round to get 29 boxes from it, then the player must neutral slide spin onto the hole behind the bonus and hope the shoes animation does not occur. |
*The [[Extra Boxes Glitch|extra boxes glitch]] can be done in this level, but it requires the player to sacrifice 2 masks in the bonus round to get 29 boxes from it, then the player must neutral slide spin onto the hole behind the bonus and hope the shoes animation does not occur. |
||
*This level is played inside the [[Cortex Vortex]], as seen in [http://i.imgur.com/4pcn69Y.jpg this] image. |
*This level is played inside the [[Cortex Vortex]], as seen in [http://i.imgur.com/4pcn69Y.jpg this] image. |
||
*It is the only level played in the Cortex Vortex not to fit the theme of space. |
*It is the only level played in the Cortex Vortex not to fit the theme of space. |
||
| + | |||
{{Cortex Strikes Back}} |
{{Cortex Strikes Back}} |
||
| + | {{Crash Bandicoot N. Sane Trilogy}} |
||
| + | [[es:Night Fight]] |
||
| + | [[fr:Night Fight]] |
||
| + | [[it:Night Fight]] |
||
| + | [[ru:Night Fight]] |
||
[[Category:Levels]] |
[[Category:Levels]] |
||
| − | [[Category:Crash Bandicoot 2: Cortex Strikes Back]] |
||
[[Category:Darkness Levels]] |
[[Category:Darkness Levels]] |
||
[[Category:Jungle Levels]] |
[[Category:Jungle Levels]] |
||
[[Category:Levels with Death Routes]] |
[[Category:Levels with Death Routes]] |
||
| ⚫ | |||
[[Category:Levels with Bonus Rounds]] |
[[Category:Levels with Bonus Rounds]] |
||
Revision as of 12:17, 21 May 2020
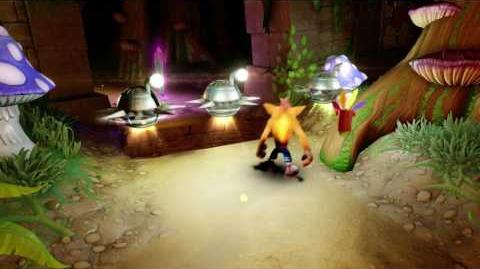
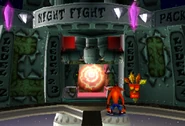
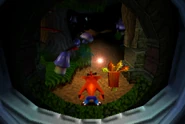
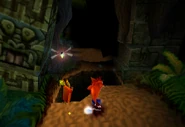
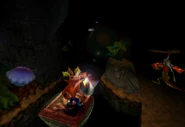
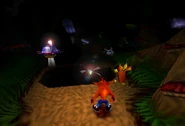
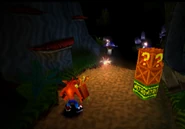
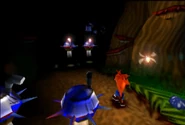
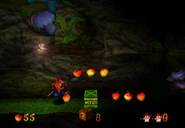
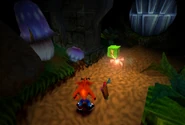
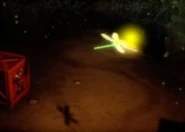
Night Fight (まっくら クラッシュ lit. Pitch-dark Crash in Japanese) is the twenty-third level and is the third level of the fifth warp room in Crash Bandicoot 2: Cortex Strikes Back and the Crash Bandicoot N. Sane Trilogy remaster of the second game. Unlike previous jungle levels, it is set during the night and Crash can't see much without the assistance of fireflies scattered throughout the level. Each firefly's light only lasts for a limited time, so players must make haste in traversing the level, so they won't be left to navigate pure pitch blackness. Enemies include possums, lizards, and spiked saucers.
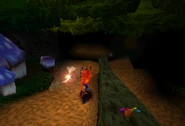
The level design itself is a mostly straightforward affair, complicated slightly by a split path after the first checkpoint. The right path continues the main level path, but the left path is a death route, both of which contain crates.
Unlike the other death routes in the game, this one can be accessed through normal means where the paths rejoin. The easiest way to get the crate gem is to take the right path, and then at the end where the two paths rejoin, backtrack a bit on the left path until the player reaches the two crates and, conveniently, a firefly will be waiting. The easiest way to get both gems in the same run is to take the death route platform and collect the death route gem, death warp to the last checkpoint then take the right path, get the crates from the back of the death route and it's as you were for the crate gem.
The bonus round also has fireflies in it.
Walkthrough
Gallery
Translation of Aku Aku Hints in the Japanese Version
- If you have got the green diamond, why don't you go to the Ruins of Mechanism? I should have said that.
Trivia
- This is one of only four levels in the Crash platforming series from Crash 2 onwards that has more crates on the bonus path than the main path, the others being Ruination and Spaced Out, also from Crash 2, and Drip, Drip, Drip from Crash Bandicoot: The Huge Adventure.
- The name of the level is a word swap on the video game series "Fight Night".
- It may also refer to the word "night light".
- This is the first level to feature fireflies. However, this is dependant on whether the player takes the secret warp to Totally Fly in Hangin' Out, which in this case it isn't.
- Either way, this is chronologically the first level to feature fireflies, the second being Totally Fly.
- The extra boxes glitch can be done in this level, but it requires the player to sacrifice 2 masks in the bonus round to get 29 boxes from it, then the player must neutral slide spin onto the hole behind the bonus and hope the shoes animation does not occur.
- This level is played inside the Cortex Vortex, as seen in this image.
- It is the only level played in the Cortex Vortex not to fit the theme of space.
| Crash Bandicoot N. Sane Trilogy | ||
| DLC Content | Crash Bandicoot: Stormy Ascent Crash Bandicoot: Warped: Future Tense | |


