Coco's Base is an area on Wumpa Island in Crash Bandicoot: On the Run!, formerly serving as the main menu. From there, Crash and Coco Bandicoot can select missions, craft ingredients and weapons or travel to previously unlocked areas for collecting ingredients or to take on challenges.
Mission Computer[]
The Mission Computer displays the various gangs deployed by Neo Cortex. Crash and Coco can only warp to a henchman or a boss if they have enough of the required Portal Weapons to fight them. New gangs appear after earning a certain amount of Power gems.
Crafting and Storage[]
Several buildings in Coco's Base are used to store ingredients and use them to hatch eggs or craft Portal Weapons. They all require Parts or Purple Crystals to be upgraded, although the Lab and Chicken Coop upgrades also need sufficient Power Gems.
Labs[]
The four labs are where Coco crafts Portal Weapons with Ingredients stored in the Silo. Crafting Portal Weapons takes time and can be sped up with Purple Crystals.
Each lab is unlocked progressively with Power Gems and feature three slots for weapons. The first slot is always unlocked by default, while the other two are respectively unlocked with Parts and Purple Crystals. Lab upgrades are also tied to obtaining Power Gems, with each level allowing the crafting of more complex Portal Weapons, and require Parts to be built.
Nitro Lab[]
The Nitro Lab produces Nitro Portal Weapons.
| Level/Upgrade | Unlocks | Parts/Crystals | Power Gems |
|---|---|---|---|
| Lvl 1 |   |
Already Unlocked | None |
  |
  |
5 8 |
4 |
  |
  |
10 20 |
21 |
  |
  |
20 30 |
30 |
 |
None | 10 |
None |
| |
None | 95 |
None |
Frosty Lab[]
The Nitro Lab produces Frosty Portal Weapons.
| Level/Upgrade | Unlocks | Parts/Crystals | Power Gems |
|---|---|---|---|
  |
  |
5 |
8 |
  |
  |
5 15 |
16 |
  |
  |
10 20 |
28 |
  |
  |
30 45 5 |
75 |
| |
None | 10 |
None |
| |
None | 95 |
None |
Inferno Lab[]
The Inferno Lab produces Inferno Portal Weapons.
| Level/Upgrade | Unlocks | Parts/Crystals | Power Gems |
|---|---|---|---|
  |
  |
20 |
45 |
  |
  |
20 20 |
55 |
  |
  |
45 50 |
60 |
  |
  |
40 60 15 |
90 |
| |
None | 40 |
None |
| |
None | 195 |
None |
Oxide Lab[]
The Oxide Lab produces Oxide Portal Weapons.
| Level/Upgrade | Unlocks | Parts/Crystals | Power Gems |
|---|---|---|---|
  |
  |
20 20 |
100 |
  |
  |
30 |
120 |
  |
  |
45 15 |
145 |
  |
  |
60 45 |
175 |
| |
None | 40 |
None |
| |
None | 295 |
None |
Chicken Coops[]
- For the full list of eggs, see here.
Chicken Coops are used to hatch eggs in exchange of feeding the Mutagen Chickens with the proper Ingredients. Eggs are then stored in the Silo and can be spent on crafting advanced Portal Weapons. Hatching eggs takes time and can be sped up with Purple Crystals.
Up to 3 different coops can be unlocked progressively with Power Gems, with up to 3 slots each for Mutagen Chickens. The first slot is always unlocked by default, while the other two are unlocked with Parts and Purple Crystals. Chicken Coop upgrades are also tied to obtaining Power Gems, with each level allowing the crafting of one more type of egg, and require Parts to be built.
North Chicken Coop[]
| Level/Upgrade | Unlocks | Parts/Crystals | Power Gems |
|---|---|---|---|
  |
  |
10 10 |
15 |
  |
  |
20 |
21 |
  |
  |
30 45 |
55 |
  |
  |
45 5 |
120 |
  |
None | 40 |
None |
| |
None | 50 |
None |
West Chicken Coop[]
| Level/Upgrade | Unlocks | Parts/Crystals | Power Gems |
|---|---|---|---|
| |
|
20 20 |
22 |
| |
|
5 50 |
30 |
| |
|
60 60 |
65 |
| |
|
60 30 |
140 |
| |
None | 80 |
None |
| |
None | 195 |
None |
South Chicken Coop[]
| Level/Upgrade | Unlocks | Parts/Crystals | Power Gems |
|---|---|---|---|
| |
|
35 45 |
60 |
| |
|
20 80 |
70 |
| |
|
90 60 60 |
95 |
| |
|
100 60 60 |
175 |
| |
None | 160 |
None |
| |
None | 395 |
None |
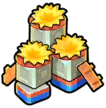
Silo[]
The Silo serves as reserve for crafting Items such as Ingredients and Farming Items (eggs). It also stores collected Parts. It starts with a limit of 250 items, although it can be upgraded with Parts by increment of 50 for a better capacity, up to 1200 items. Unlike the labs and coops, those upgrades are not directly tied to obtaining Power Gems, but Delta Parts and Omega Parts can only be respectively obtained for the first time in the levels Snow Go and Road to Ruin, unlocked at 75 ![]() and 120
and 120 ![]() .
.
The lightbulb on the Silo and its menu turns orange when the building is nearing capacity and red when it has reached its limit. A Silo can have its limit breached but will not accept any more Item when that happens, unless obtained from Challenge Run and the Vending Machine. Items from the Silo can be spent on crafting stations, building upgrades or sold for Wumpa Fruits.
| Capacity |   |
|
  |
  |
|
|
|
|
|
|
|---|---|---|---|---|---|---|---|---|---|---|
| Required Parts | None | 25 30 |
30 40 |
35 45 |
40 50 |
80 20 |
50 25 |
80 25 |
60 30 |
80 35 |
| Capacity | |
|
|
|
|
|
|
|
|
|
|---|---|---|---|---|---|---|---|---|---|---|
| Required Parts | 70 40 |
100 40 |
120 45 |
95 40 |
140 55 |
105 50 |
160 65 |
120 60 |
140 70 |
160 80 |
Wumpa Fruit Crates[]
The pile of crates next to the Silo shows how many Wumpa Fruits Crash and Coco have collected. They can be spent on crafting Portal Weapons or converted into Trophies at the Tiki Head.
Vending Machine[]


The Vending Machine is an in-game shop similar to the Pit Stop in Nitro-Fueled, where the player can claim free weapons and ingredients daily after watching an ad. It also features daily deals: character skins and ingredients rotating daily and which can be bought with Crystals. Finally, Crystals can be purchased with real money as a form of micro-transaction.
Daily Deals[]
Note that Ingredients and Weapons only appear in the Vending Machine after they are unlocked through story progression. Some skins also only appear after their corresponding bundles have showed up once and gone.
Free Ingredients[]
| Ingredients | 3 |
3 |
3 |
3 |
3 |
3 |
3 |
3 |
|---|---|---|---|---|---|---|---|---|
| Ingredients | 3 |
2 |
3 |
2 |
2 |
3 |
2 |
2 |
| Ingredients | 2 |
200 |
250 |
350 |
400 |
450 |
500 |
Ingredients for sale[]
| Ingredients | ? |
? |
10 |
30 |
10 |
30 |
|---|---|---|---|---|---|---|
| Prices | ? |
? |
18 |
55 |
27 |
80 |
| Ingredients | 10 |
50 |
10 |
10 | ||
| Prices | 36 |
90 |
36 |
45 | ||
| Ingredients | 1 |
3 |
1 |
1 |
2 | |
| Prices | 22 |
65 |
26 |
70 |
140 |
Portal Weapons for sale[]
| Weapons | ? |
1 |
3 |
1 |
1 |
1 |
3 |
1 |
1 |
3 |
3 |
|---|---|---|---|---|---|---|---|---|---|---|---|
| Prices | ? |
13 |
38 |
90 |
105 |
16 |
49 |
35 |
95 |
340 |
265 |
| Weapons | 1 |
3 |
1 |
1 |
1 |
3 |
1 |
1 |
1 | ||
| Prices | 55 |
160 |
215 |
400 |
60 |
175 |
355 |
530 |
890 |
[]
Several buildings in Coco's Base are directly related to Seasons, with some of them only turning active during specific events.
Season Event Area[]
The Season Event Area is a dock on the shore of Coco's Base where a different pontoon is moored when a Season is taking place. Selecting it displays the various events and rewards for the current Season. It is unlocked after and remains empty until acquiring 10 ![]() , even during a Season.
, even during a Season.
")
")
")
")
")
")
")
")
")
")
")
")
")
Trophy Stand[]
The Trophy Stand displays how many Trophies Crash and Coco have currently collected. During a break between events, the stand appears unplugged and unlit, and only displays Trophies to be redeemed for the coming Season. During an event and when the player is in a team, it appears plugged in and displays the current Trophy count as well as the rewards for the current Season's Team Leaderboards. It lights up progressively as Crash and Coco collect Trophies.
")
")
")
")
")
Tiki Head[]


The Tiki Head can be fed Wumpa Fruits and Steps and convert them into Trophies for the current Season. It is unlocked after acquiring 11 ![]() .
.
Steps Convertion[]
| Steps | 250 |
5,000 |
20,000 |
|---|---|---|---|
| Conversion Rate | 250 |
200 |
100 |
| Total Trophies | 1 |
25 |
200 |
Wumpa Fruits Conversion[]
| Wumpa Fruits | 300 |
2,500 |
10,000 |
|---|---|---|---|
| Convertion Rate | 300 |
250 |
200 |
| Total Trophies | 1 |
10 |
50 |
Mission Board[]
The Mission Board allows players to claim Mojo and Trophies in exchange for Ingredients, Eggs and Portal Weapons. During Seasons, missions appear once a week, and stay active for only 4 days or until the Mojo gauge has been filled out.
Rewards[]
| Required Mojo | 40 |
120 |
200 |
|---|---|---|---|
| Rewards | 280 |
500 |
900 |
Missions[]
Note that the required items vary depending on the player's amount of earned Power Gems. For example, no mission involving Red Eyes can appear on the Mission Board before the player has unlocked The Lab. Also, the required items may vary from one week to another.
- Ingredients
| Items | |
|
|
|
|
|
|
|
|
|---|---|---|---|---|---|---|---|---|---|
| 3 |
800 | 30 | 25 | 30 | 20 | 15 | 10 | 6 | 5 |
| 3 |
N/A | 60 | 50 | 45 | 40 | 30 | 20 | 12 | 10 |
| 3 |
N/A | 90 | 75 | 60 | 60 | 45 | 30 | 18 | 15 |
- Farming Ingredients
| Items | |
|
|
|---|---|---|---|
| 3 |
1 | N/A | N/A |
| 3 |
N/A | 1 | N/A |
| 3 |
N/A | N/A | 1 |
- Portal Weapons
| Items | |
|
|
|
|---|---|---|---|---|
| 3 |
5 | 1 | N/A | N/A |
| 3 |
N/A | N/A | 1 | N/A |
| 3 |
N/A | N/A | N/A | 1 |
- Parts
| Items | |
|
|---|---|---|
| 3 |
20 | 15 |
| 3 |
40 | 30 |
| 3 |
60 | 45 |
Aku Aku's Quests[]
Aku Aku's Quests appear once daily and refresh every day at the same hour if the quests from the day before have already been cleared. Each day proposes 3 quests of different types. Besides the first quests during the game's tutorial, completing the 3 daily quests rewards 5 ![]() and 25
and 25 ![]() .
.
Ingredients Collection[]
-
 Collect Wumpa Fruit. (800)
 - Collect Glow Bark. (30)
- Collect Nitric Funguses. (25)
- Collect Wiggle Weed. (20)
- Collect Chill Berries. (30)
- Collect Shell Shards. (20)
- Collect Brain Freezes. (15)
- Collect Snow Cabbages. (15)
- Collect Flame Orbs. (25)
- Collect Magma Chunks. (15)
- Collect Red Eyes. (15)
- Collect Stinky Shrooms. (10)
- Collect Glowmatoes (25)
- Collect Atom Stones. (20)
- Collect Fizzle Flakes. (6)
- Collect Bellow Peppers. (6)
Weapon Manufacturing[]
- Make Nitro Serums. (5)
- Make Nitro Bombs. (2)
- Make a Nitro Raygun.
- Make a Frosty Serum.
- Make a Frosty Bomb.
- Make an Inferno Serum.
- Make an Inferno Bomb.
- Make an Inferno Raygun.
- Make an Oxide Serum.
- Make an Oxide Bomb.
Other challenges[]
- Go on Collection Runs. (1)
- Go on a Challenge Run. (Gem Runs do not count)
- Play a Time Trial.
- Earn some Trophies. (200)
- Smash some crates! (40)
- () Compete in a Survival Run.
Gallery[]
")
")
")
")
")
")
")
")
")