(→Trivia) Tag: Visual edit |
No edit summary |
||
| (46 intermediate revisions by 20 users not shown) | |||
| Line 1: | Line 1: | ||
{{Infobox Crash Bandicoot level |
{{Infobox Crash Bandicoot level |
||
| − | | |
+ | |image =<gallery>Cc2.png|Original |
| + | Crash Crush Remastered.jpg|N. Sane Trilogy</gallery> |
||
| − | | |
+ | |name = Crash Crush |
| − | | number=9 (Warp Room 2) |
||
| − | | |
+ | |number = 9 (Warp Room 2) |
| + | |crates = 57 (13 in bonus) |
||
| − | | gem =Power Crystal, Clear Gem |
||
| + | |relictimes = {{icon|sapphire}}: 1:57.00<br>{{icon|gold}}: 1:19.83<br>{{icon|platinum}}: 1:07.87 |
||
| ⚫ | |||
| + | |developertime = 1:05.56 |
||
| ⚫ | |||
| + | |gems = {{icon|crystal}} {{icon|cleargem}} |
||
| ⚫ | }}'''Crash Crush''' is the ninth level and is the fourth level of the second warp room in ''[[Crash Bandicoot 2: Cortex Strikes Back]]''. It is a sequel of sorts to [[Crash Dash (Crash Bandicoot 2: Cortex Strikes Back)|Crash Dash]], in which [[Crash]] is again tasked with running away from gargantuan snowballs during the evening. Crash still has to dodge mines and electric barriers, but this time he is assisted by turbo pads scattered around the stage. Players will have to make efficient use of these turbo boosts on the final snowball run, as it contains a [[Locked Crate|locked crate]] that Crash won't have enough time to belly-flop open unless he has a significant lead over the snowball. Shortly after the first checkpoint, there is a brief split path Crash must take if he wants all the crates |
||
| + | |hint = Sliding can help you avoid dangerous obstacles. |
||
| ⚫ | |||
| ⚫ | |||
| ⚫ | }}'''Crash Crush''' (ゆきだま スライディン lit. ''Snowball Sliding'' in Japanese) is the ninth level and is the fourth level of the second warp room in ''[[Crash Bandicoot 2: Cortex Strikes Back]]'' and the ''[[Crash Bandicoot N. Sane Trilogy]]'' remaster of the second game. It is a sequel of sorts to [[Crash Dash (Crash Bandicoot 2: Cortex Strikes Back)|Crash Dash]], in which [[Crash]] is again tasked with running away from gargantuan snowballs during the evening. Crash still has to dodge mines and electric barriers, but this time he is assisted by turbo pads scattered around the stage. Players will have to make efficient use of these turbo boosts on the final snowball run, as it contains a [[Locked Crate|locked crate]] that Crash won't have enough time to belly-flop open unless he has a significant lead over the snowball. Shortly after the first checkpoint, there is a brief split path Crash must take if he wants all the crates. |
||
In this level, [[Nitro Crates|nitro crates]] are destroyed by the snowball, and there is no [[Nitro Switch Crate|nitro switch crate]]. The problem is that it's possible to get very far ahead of the snowball and so if the snowball running over the nitro crates is outside of the range of the camera, then they won't be destroyed. Therefore, if Crash is very far ahead of the snowball, he must wait to see it hit the nitro crates, in order to get the gem. For whatever reason, this warning is not stated in most walkthroughs of the game. |
In this level, [[Nitro Crates|nitro crates]] are destroyed by the snowball, and there is no [[Nitro Switch Crate|nitro switch crate]]. The problem is that it's possible to get very far ahead of the snowball and so if the snowball running over the nitro crates is outside of the range of the camera, then they won't be destroyed. Therefore, if Crash is very far ahead of the snowball, he must wait to see it hit the nitro crates, in order to get the gem. For whatever reason, this warning is not stated in most walkthroughs of the game. |
||
| − | ==Types of crates== |
||
| − | *[[Iron Arrow Crate|Arrow Crate - iron]] (bonus round only) |
||
| − | *[[Basic Crate]] |
||
| − | *[[Bounce Crate]] |
||
| − | *[[Checkpoint Crate]] |
||
| − | *[[! Crate|! Crate - standard ]](bonus round only) |
||
| − | *[[Iron Crate]] (bonus round only) |
||
| − | *[[Locked Crate]] |
||
| − | *[[Nitro Crate]] |
||
| − | *[[Outline Crate]] (bonus round only) |
||
| − | *[[? Crate]] |
||
==Walkthrough== |
==Walkthrough== |
||
| + | <gallery> |
||
| ⚫ | |||
| + | Crash Bandicoot 2 Beta, Part 11 Crash Crush-2 |
||
| ⚫ | |||
| + | File:Crash Bandicoot 2 Walkthrough - Warp Room 2 Crash Crush|The 9th Level Remastered |
||
| + | PLATINUM RELIC CRASH BANDICOOT N SANE TRILOGY Crash 2 - Crash Crush|The 9th Level in Time Trial Mode |
||
| + | </gallery> |
||
| + | |||
| + | {{clear}} |
||
==Gallery== |
==Gallery== |
||
<gallery> |
<gallery> |
||
cc1.png |
cc1.png |
||
| − | + | Crashcrush2.png |
|
cc3.png |
cc3.png |
||
cc4.png |
cc4.png |
||
| Line 37: | Line 37: | ||
cc9.png |
cc9.png |
||
crash crush level icon.png|Level icon from the load/save screen. |
crash crush level icon.png|Level icon from the load/save screen. |
||
| + | C4l90ZPW8AAWHL7.jpg |
||
| + | CrashCrushFC.PNG|Fake Crash's location in the level. |
||
| + | Crash Crush Remastered.jpg|Remastered level. |
||
| + | Crash Crush.png|Icon from N. Sane Trilogy Save/Load Screen |
||
| + | 09_SaveSlotImages_CrashCrush.png|Level icon from N. Sane Trilogy Save/Load Screen |
||
</gallery> |
</gallery> |
||
| Line 128: | Line 133: | ||
CCB11.jpg |
CCB11.jpg |
||
CCB12.jpg |
CCB12.jpg |
||
| − | |||
CC73.jpg |
CC73.jpg |
||
CC74.jpg |
CC74.jpg |
||
| Line 146: | Line 150: | ||
CC88.jpg |
CC88.jpg |
||
CC89.jpg |
CC89.jpg |
||
| − | |||
</gallery> |
</gallery> |
||
| + | |||
==Trivia== |
==Trivia== |
||
| − | *As with the other chase levels in this game, [ |
+ | *As with the other chase levels in this game, [[Aku Aku]] is banned from this level, so even if the player has Aku Aku mask(s) when entering the level, the player loses the mask(s). |
*If the player repeatedly dies on a particular section of the level, then the boulder will slow down on that section of the level. This is a part of the [[Dynamic Difficulty Adjustment]] system that awards players an Aku Aku mask or an extra [[Checkpoint Crate|checkpoint]] on other levels, which wouldn't work in this level since Aku Aku is banned and checkpoints wouldn't make sense in the middle of a chase. |
*If the player repeatedly dies on a particular section of the level, then the boulder will slow down on that section of the level. This is a part of the [[Dynamic Difficulty Adjustment]] system that awards players an Aku Aku mask or an extra [[Checkpoint Crate|checkpoint]] on other levels, which wouldn't work in this level since Aku Aku is banned and checkpoints wouldn't make sense in the middle of a chase. |
||
| + | *The third boulder sits higher on the platform than the others. |
||
| + | *According to the Crash Bandicoot 2 Japanese October 1997 Trailer PlayStation Taikenban Vol. 2, this level was set on daytime instead of evening. |
||
| + | *This is the second chase level in Crash Bandicoot 2, the first is [[Crash Dash (level)|Crash Dash]] and the third is [[Un-Bearable]]. |
||
| + | *There is a secret area in this level's [[Bonus Round|bonus round]]. It is located directly under the first platform after entering the bonus round. The area consists 21 additional [[Wumpa Fruit|wumpa fruit]] and an extra life. To access it, the player must fall to the left of the first platform. |
||
| + | *The BradyGames strategy guide for this game lists the box total on this level as 48. The other differences between the guide and the actual game match those of the leaked beta version, in which this level has 57 crates, the same as in the final version. While it's possible that an earlier beta version was used to write the guide, it's more likely that the writers mistakenly inserted the box total for [[Bear It]], the level immediately before Crash Crush. |
||
| + | *In the ''N. Sane Trilogy'', the snowball can now break all the crates on the path, where as in the original it just breaks a part of the crates. The similar goes for [[Boulders]] and [[Boulder Dash]] and [[Crash Dash (level)|Crash Dash]]. |
||
{{Cortex Strikes Back}} |
{{Cortex Strikes Back}} |
||
| + | {{Crash Bandicoot N. Sane Trilogy}} |
||
| + | |||
| + | [[es:Crash Crush]] |
||
| + | [[fr:Crash Crush]] |
||
| + | [[it:Crash Crush]] |
||
| + | [[pt-br:Crash Crush]] |
||
[[Category:Levels]] |
[[Category:Levels]] |
||
| ⚫ | |||
[[Category:Crash Bandicoot 2: Cortex Strikes Back]] |
[[Category:Crash Bandicoot 2: Cortex Strikes Back]] |
||
[[Category:Snow/Ice Levels]] |
[[Category:Snow/Ice Levels]] |
||
[[Category:Chase Levels]] |
[[Category:Chase Levels]] |
||
[[Category:Mountainous Levels]] |
[[Category:Mountainous Levels]] |
||
| + | [[Category:Levels with Bonus Rounds]] |
||
| ⚫ | |||
Revision as of 11:57, 21 May 2020
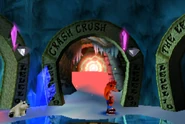
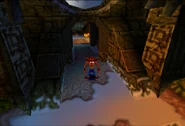
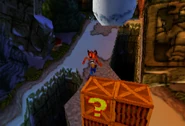
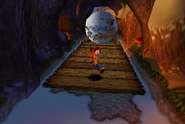
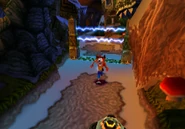
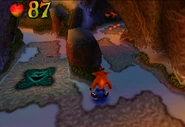
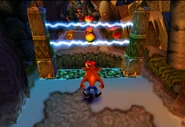
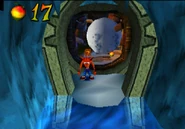
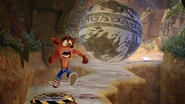
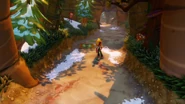
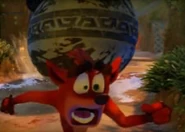
Crash Crush (ゆきだま スライディン lit. Snowball Sliding in Japanese) is the ninth level and is the fourth level of the second warp room in Crash Bandicoot 2: Cortex Strikes Back and the Crash Bandicoot N. Sane Trilogy remaster of the second game. It is a sequel of sorts to Crash Dash, in which Crash is again tasked with running away from gargantuan snowballs during the evening. Crash still has to dodge mines and electric barriers, but this time he is assisted by turbo pads scattered around the stage. Players will have to make efficient use of these turbo boosts on the final snowball run, as it contains a locked crate that Crash won't have enough time to belly-flop open unless he has a significant lead over the snowball. Shortly after the first checkpoint, there is a brief split path Crash must take if he wants all the crates.
In this level, nitro crates are destroyed by the snowball, and there is no nitro switch crate. The problem is that it's possible to get very far ahead of the snowball and so if the snowball running over the nitro crates is outside of the range of the camera, then they won't be destroyed. Therefore, if Crash is very far ahead of the snowball, he must wait to see it hit the nitro crates, in order to get the gem. For whatever reason, this warning is not stated in most walkthroughs of the game.
Walkthrough
Gallery
Viewing Level
Trivia
- As with the other chase levels in this game, Aku Aku is banned from this level, so even if the player has Aku Aku mask(s) when entering the level, the player loses the mask(s).
- If the player repeatedly dies on a particular section of the level, then the boulder will slow down on that section of the level. This is a part of the Dynamic Difficulty Adjustment system that awards players an Aku Aku mask or an extra checkpoint on other levels, which wouldn't work in this level since Aku Aku is banned and checkpoints wouldn't make sense in the middle of a chase.
- The third boulder sits higher on the platform than the others.
- According to the Crash Bandicoot 2 Japanese October 1997 Trailer PlayStation Taikenban Vol. 2, this level was set on daytime instead of evening.
- This is the second chase level in Crash Bandicoot 2, the first is Crash Dash and the third is Un-Bearable.
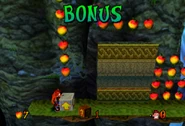
- There is a secret area in this level's bonus round. It is located directly under the first platform after entering the bonus round. The area consists 21 additional wumpa fruit and an extra life. To access it, the player must fall to the left of the first platform.
- The BradyGames strategy guide for this game lists the box total on this level as 48. The other differences between the guide and the actual game match those of the leaked beta version, in which this level has 57 crates, the same as in the final version. While it's possible that an earlier beta version was used to write the guide, it's more likely that the writers mistakenly inserted the box total for Bear It, the level immediately before Crash Crush.
- In the N. Sane Trilogy, the snowball can now break all the crates on the path, where as in the original it just breaks a part of the crates. The similar goes for Boulders and Boulder Dash and Crash Dash.
| Crash Bandicoot N. Sane Trilogy | ||
| DLC Content | Crash Bandicoot: Stormy Ascent Crash Bandicoot: Warped: Future Tense | |


