Chainoffire (talk | contribs) (added NST times) |
Thaswordster (talk | contribs) No edit summary |
||
| (37 intermediate revisions by 21 users not shown) | |||
| Line 1: | Line 1: | ||
{{Level infobox |
{{Level infobox |
||
|Level Name = Bye Bye Blimps |
|Level Name = Bye Bye Blimps |
||
| − | |image = |
+ | |image = <gallery> |
| + | Byebyeblimps.png|Original |
||
| ⚫ | |||
| + | Bye Bye Blimps Remastered.jpg|N. Sane Trilogy |
||
| + | </gallery> |
||
| ⚫ | |||
|boxes = 11 |
|boxes = 11 |
||
| + | |gems = {{icon|crystal}} {{icon|cleargem}} |
||
| − | |gems = 1x [[Crystal]], 1x [[Gem]] |
||
| + | |hint = Invert your vehicle controls in the options menu. |
||
|relictimes = PAL: |
|relictimes = PAL: |
||
| − | + | {{icon|sapphire}}: 1:09:00<br>{{icon|gold}}: 0:58:40<br>{{icon|platinum}}: 0:51:48 |
|
| + | |||
NTSC: |
NTSC: |
||
| − | + | {{icon|sapphire}}: 1:09:00<br>{{icon|gold}}: 0:58:40<br>{{icon|platinum}}: 0:51:50 |
|
| − | Remake: |
||
| + | Remaster: |
||
| ⚫ | |||
| + | |||
| ⚫ | |||
| + | |developertime = Original: 0:38:63 ([[wikipedia:Jason Rubin|Jason Rubin]]) |
||
| + | <br>Remaster: 0:25.69 |
||
|prev = [[Sphynxinator]] |
|prev = [[Sphynxinator]] |
||
| − | |next = [[Tell No Tales]] |
+ | |next = [[Tell No Tales]] |
| ⚫ | |||
| + | The level's name is a reference to the stage production "Bye Bye Birdie". |
||
| ⚫ | '''Bye Bye Blimps''' (コルテックスの ひこうせん lit. ''Cortex's Blimps'' in Japanese) is the seventeenth level and is the second level of the fourth warp room in |
||
| + | |||
| + | ==Overview== |
||
| + | Set in World War I, this level finds [[Coco Bandicoot|Coco]] having to shoot down seven of Cortex's blimps in her biplane, the Flying Queen. It's the first level in the Crash series to use the biplane. |
||
| ⚫ | |||
| + | |||
| ⚫ | |||
| + | |||
| + | In a later update applied to the ''N. Sane Trilogy'', this level is no longer exclusive to Coco. [[Crash Bandicoot|Crash]] can also participate in this level using his biplane instead. |
||
==Walkthrough== |
==Walkthrough== |
||
| Line 25: | Line 42: | ||
Bye Bye Blimps - Clear Gem - Crash Bandicoot 3 Warped - 105% Playthrough (Part 18)|Gem |
Bye Bye Blimps - Clear Gem - Crash Bandicoot 3 Warped - 105% Playthrough (Part 18)|Gem |
||
Bye Bye Blimps - Platinum Relic - Crash Bandicoot 3 Warped - 105% Playthrough (Part 48)|Relic |
Bye Bye Blimps - Platinum Relic - Crash Bandicoot 3 Warped - 105% Playthrough (Part 48)|Relic |
||
| + | Crash Bandicoot 3 - N. Sane Trilogy - 105% Walkthrough, Part 22 Bye Bye Blimps (Gem) |
||
</gallery> |
</gallery> |
||
| − | |||
| − | ==Crates and Balloons== |
||
| ⚫ | |||
| − | |||
| ⚫ | If players shoot a [[ |
||
==Gallery== |
==Gallery== |
||
<gallery> |
<gallery> |
||
| + | Bye Bye Blimps Thumbnail.png |
||
bbb1.png |
bbb1.png |
||
bbb2.png |
bbb2.png |
||
| Line 44: | Line 58: | ||
Bye Bye Blimps Prototype 2.png |
Bye Bye Blimps Prototype 2.png |
||
17. Bye Bye Blimps.jpg |
17. Bye Bye Blimps.jpg |
||
| + | Bye Bye Blimps Remastered.jpg|Remastered level. |
||
| + | Bye Bye Blimps Remastered.png |
||
| + | CB3BlimpModel.png|The blimp's model. |
||
| + | 17_SaveSlotImages_ByeByeBlimps.png|Level icon from N. Sane Trilogy Save/Load Screen |
||
</gallery> |
</gallery> |
||
==Trivia== |
==Trivia== |
||
| + | *[[Aku Aku]] is not usable in this level. |
||
| − | *The name of this level may be a play on the phrase "Bye Bye Birdy", a stage production composed in 1958. The "Bye Bye" part may be a reference to Coco shooting down the blimps in the level. |
||
| − | * |
+ | *In the original game, players can start a new game with every powerup available immediately from this level. On the title screen, if the player holds the triangle button as the third demo loads, the player will be able to assume control of Coco in the demo. If the player then pauses the game at this point and chooses to return to the Warp Room, they will start a new game with all of Crash's powers. |
| − | *Bye Bye Blimps, as well as the other two flying stages [[Mad Bombers]] and [[Rings of Power]], are the only stages in the game that don't feature a [[Box Counter|box counter]], which is because there is no exit in either of these levels. Coco acquires the box gem instantly when the last box is broken. |
||
| − | *This is the first plane level in the Crash series. |
||
| − | *The plane [[Lab Assistant]] enemies in the plane levels only shoot at you if you are facing them. |
||
| − | *Early footage show that this level used to have Crash instead of Coco as the playable character. It's very likely that she wasn't always intended to fly a plane like Crash, especially since this is the only level where she does so. |
||
| − | *Players can start a new game with every powerup available immediately from this level. On the title screen, if the player holds the triangle button as the third demo loads, the player will be able to assume control of Coco in the demo. If the player then pauses the game at this point and chooses to return to the Warp Room, they will start a new game with all of Crash's powers. |
||
{{Warped}} |
{{Warped}} |
||
| ⚫ | |||
| + | |||
| + | [[es:Bye Bye Blimps]] |
||
| + | [[fr:Bye Bye Blimps]] |
||
| + | [[it:Bye Bye Blimps]] |
||
[[Category:Levels]] |
[[Category:Levels]] |
||
| − | [[Category:Crash Bandicoot 3: Warped]] |
||
[[Category:Flying Levels]] |
[[Category:Flying Levels]] |
||
[[Category:Coco Levels]] |
[[Category:Coco Levels]] |
||
| ⚫ | |||
[[Category:Vehicular Levels]] |
[[Category:Vehicular Levels]] |
||
[[Category:Levels with Lab Assistants]] |
[[Category:Levels with Lab Assistants]] |
||
| + | [[Category:Levels without a box counter]] |
||
Revision as of 23:51, 13 March 2020
Bye Bye Blimps (コルテックスの ひこうせん lit. Cortex's Blimps in Japanese) is the seventeenth level and is the second level of the fourth warp room in Crash Bandicoot: Warped and its remake in the N. Sane Trilogy.
The level's name is a reference to the stage production "Bye Bye Birdie".
Overview
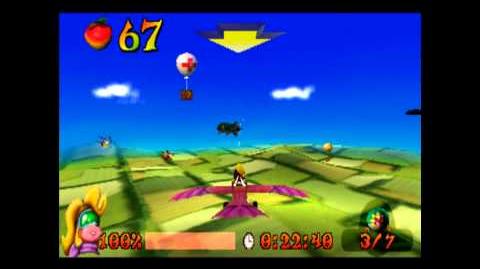
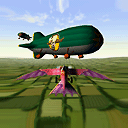
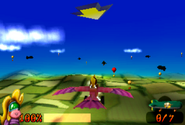
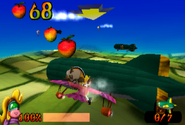
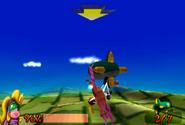
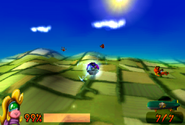
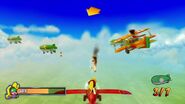
Set in World War I, this level finds Coco having to shoot down seven of Cortex's blimps in her biplane, the Flying Queen. It's the first level in the Crash series to use the biplane. Shooting crates gives wumpa fruit or lives, depending on the crate shot. After the crate is shot, the balloon floats away. The gem is automatically awarded, provided Coco destroys all crates.
If players shoot a balloon, the crate will quickly fall from the sky. White balloons with a red cross restore health. Additionally, the stopwatch used to begin the time trial is attached to a red balloon.
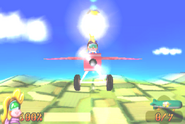
In a later update applied to the N. Sane Trilogy, this level is no longer exclusive to Coco. Crash can also participate in this level using his biplane instead.
Walkthrough
Gallery
Trivia
- Aku Aku is not usable in this level.
- In the original game, players can start a new game with every powerup available immediately from this level. On the title screen, if the player holds the triangle button as the third demo loads, the player will be able to assume control of Coco in the demo. If the player then pauses the game at this point and chooses to return to the Warp Room, they will start a new game with all of Crash's powers.
| Crash Bandicoot N. Sane Trilogy | ||
| DLC Content | Crash Bandicoot: Stormy Ascent Crash Bandicoot: Warped: Future Tense | |


