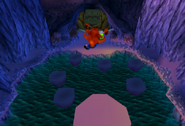
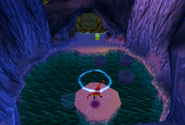
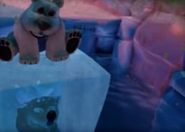
Mewtwoclone (talk | contribs) No edit summary |
No edit summary |
||
| (22 intermediate revisions by 13 users not shown) | |||
| Line 1: | Line 1: | ||
{{Infobox Crash Bandicoot level |
{{Infobox Crash Bandicoot level |
||
| − | |image = |
+ | |image =<gallery>Beardown2.png|Original |
| + | Bear Down Remastered.jpg|N. Sane Trilogy</gallery> |
||
|name = Bear Down |
|name = Bear Down |
||
|number = 13 (Warp Room 3) |
|number = 13 (Warp Room 3) |
||
|crates = 42 |
|crates = 42 |
||
| − | |gems = {{ |
+ | |gems = {{icon|crystal}} {{icon|cleargem}} |
| − | |hint=Tap run before a jump for greater distance. |
+ | |hint = Tap run before a jump for greater distance. |
| − | |developertime=0:39.78 |
+ | |developertime = 0:39.78 |
| − | |relictimes = {{ |
+ | |relictimes = {{icon|sapphire}}: 1:03.00<br>{{icon|gold}}: 0:49.85<br>{{icon|platinum}}: 0:46.14 |
|prev = [[Sewer or Later]] |
|prev = [[Sewer or Later]] |
||
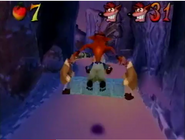
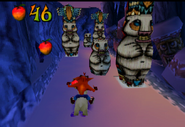
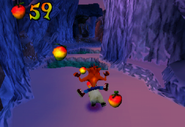
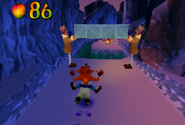
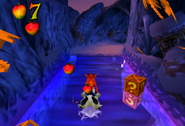
| ⚫ | |next = [[Road to Ruin]]}}'''Bear Down''' (しろくま だいジャンプ lit. ''White Bear Big Jump'' in Japanese) is the thirteenth level and is the third level of the third warp room in ''[[Crash Bandicoot 2: Cortex Strikes Back]]'' and the ''[[Crash Bandicoot N. Sane Trilogy]]'' remaster of the second game. The level plays similar to [[Bear It]], where Crash rides on [[Polar]] and must maneuver him through a maze of obstacles and enemies that he must avoid. The level of difficulty for this level is higher than Bear It, and it takes place during the evening rather than during the day. There are also more pits and obstacles that Crash and Polar must navigate around. The [[Parka Lab Assistant|parka lab assistants]] are the new enemies. They lift iron crates and drop them every few seconds. The main objective of this level is to make it to the end of it without crashing into any enemies or obstacles. Since there are no Aku Aku masks in this level, Crash cannot hit any of the enemies that are scattered around the course. Crash can control the speed of Polar by having him speed up by pressing {{icon|circle}}or R1, which allows him to reach higher crates, jumping over larger pits, and speeding up. However, if Crash goes too fast with Polar, then he has a higher chance of hitting another enemy or obstacle. Crash also has to be careful of the [[TNT crates]] around the level, as they will countdown as soon as he gets near them. |
||
| − | |next = [[Road to Ruin]] |
||
| ⚫ | }}'''Bear Down''' (しろくま だいジャンプ lit. ''White Bear Big Jump'' in Japanese) is the thirteenth level and is the third level of the |
||
Once Crash reaches the end of the level, Polar will launch him across a giant chasm, which will place him in front of the exit to the warp room. However, if Crash turns his back to the warp room exit, he will notice a group of icebergs in the water. Crash can jump on the icebergs to access a secret portal, which will warp him to a secret warp room and allows him to go to the secret way of [[Air Crash]], thus allowing him to get the crate gem. In the process of jumping on the icebergs, Crash has to be careful, as the icebergs will start to sink after being jumped on. |
Once Crash reaches the end of the level, Polar will launch him across a giant chasm, which will place him in front of the exit to the warp room. However, if Crash turns his back to the warp room exit, he will notice a group of icebergs in the water. Crash can jump on the icebergs to access a secret portal, which will warp him to a secret warp room and allows him to go to the secret way of [[Air Crash]], thus allowing him to get the crate gem. In the process of jumping on the icebergs, Crash has to be careful, as the icebergs will start to sink after being jumped on. |
||
| Line 25: | Line 25: | ||
*[[TNT Crate]] |
*[[TNT Crate]] |
||
==Hazard Count== |
==Hazard Count== |
||
| − | * |
+ | *Totem poles: 20 |
| − | * |
+ | *[[Orca]]s: 6 |
| ⚫ | |||
| − | * [[Orca|Orcas]]: |
||
| + | *[[Seal]]s: 2 |
||
| ⚫ | |||
| + | |||
| + | ==Stage Parameters== |
||
==Walkthrough== |
==Walkthrough== |
||
<gallery> |
<gallery> |
||
| − | + | Crash Bandicoot 2 Beta, Part 16 Bear Down |
|
| + | Bear Down - Clear Gem - Crash Bandicoot 2 Cortex Strikes Back - 100% Playthrough (Part 15)|The 13th Level |
||
| + | Crash Bandicoot 2 Walkthrough - Warp Room 3 Bear Down|The 13th Level Remastered |
||
PLATINUM RELIC CRASH BANDICOOT N.SANE TRILOGY Crash 2 - Bear Down |
PLATINUM RELIC CRASH BANDICOOT N.SANE TRILOGY Crash 2 - Bear Down |
||
| − | <gallery> |
+ | </gallery> |
| − | {{clr}} |
||
| − | |||
==Enemies and Obstacles== |
==Enemies and Obstacles== |
||
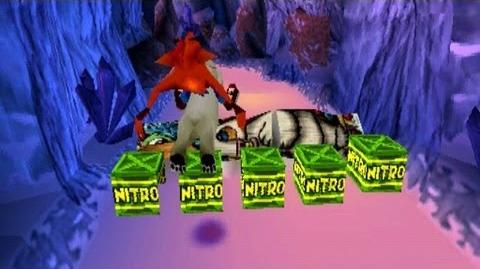
These are the different enemies and obstacles that Crash and Polar face while traveling through this level. Since there are no Aku Aku masks in the level, Crash cannot afford to hit any of the enemies, as they will cause him to instantly die. |
These are the different enemies and obstacles that Crash and Polar face while traveling through this level. Since there are no Aku Aku masks in the level, Crash cannot afford to hit any of the enemies, as they will cause him to instantly die. |
||
| − | |||
| − | *'''Totem Poles''' - These totem poles, which seem to take the design of a polar bear, are scattered throughout the level. They appear in different sizes and are sometimes found lying on the ground. Crash must avoid crashing into them, as they will cause him to fall off Polar. He must jump over the ones on the ground also, as they will catapult him off of Polar. |
||
| − | *'''[[Orca]]s''' - These giant mammals jump out of the icy water while Crash is jumping over the chasms. The orcas will either jump out of the left side or the right side of the water. Crash must predict the direction they jump out of because he will lose a life if he hits one. |
||
| − | *'''[[Seal]]s''' - The seals will stroll back and forth along the path, in which Crash must avoid, as they will cause him to lose a live if he hits one. |
||
| − | *'''[[Parka Lab Assistant]]s''' - These lab assistants appear in the middle of the path and lift a heavy crate made of metal up and down. Crash must predict when the lab assistants lift the crates up or place them down, as he must avoid them depending on what position they are in. |
||
| − | *'''[[TNT Crates]]''' - Unlike most TNT crates that start counting when Crash jumps on top of one, these will countdown as soon as Crash gets near them. He must stay away from their blast range while counting down, or else they will cause him to incinerate on impact and make his underwear drop onto Polar. |
||
| − | |||
==Gallery== |
==Gallery== |
||
<gallery> |
<gallery> |
||
| + | BearDown.png |
||
| − | + | BearDown2.png|Crash encountering a group of Lab Assistants who specialize in lifting a heavy crate. |
|
Image:BearDown3.png|Crash dodging an Orca while jumping over a chasm. |
Image:BearDown3.png|Crash dodging an Orca while jumping over a chasm. |
||
Image:BearDown4.png|Crash jumping on the icebergs towards the secret Warp Room. |
Image:BearDown4.png|Crash jumping on the icebergs towards the secret Warp Room. |
||
| Line 60: | Line 56: | ||
beardown8.png |
beardown8.png |
||
beardown9.png |
beardown9.png |
||
| − | bear down level icon.png|Level icon from the load/save screen |
+ | bear down level icon.png|Level icon from the load/save screen. |
| + | Bear Down Remastered.jpg|Remastered level. |
||
| + | Bear Down (save).|Icon from N. Sane Trilogy Save/Load Screen |
||
</gallery> |
</gallery> |
||
| Line 127: | Line 125: | ||
==Trivia== |
==Trivia== |
||
*The name of the level is based on the phrase "man down!", which is used when a fellow soldier is wounded or killed in a battle. |
*The name of the level is based on the phrase "man down!", which is used when a fellow soldier is wounded or killed in a battle. |
||
| − | *Although it could also be a play on the phrase "bearing down", which means to approach something in a determined and threatening manner, and usually fast. |
+ | **Although it could also be a play on the phrase "bearing down", which means to approach something in a determined and threatening manner, and usually fast. |
*As with the other bear levels in this game, [[Aku Aku]] is banned from this level, so even if the player has Aku Aku masks when entering the level, the player loses them. |
*As with the other bear levels in this game, [[Aku Aku]] is banned from this level, so even if the player has Aku Aku masks when entering the level, the player loses them. |
||
| + | *There is a 2 second delay for the start of the music on the PAL version |
||
| ⚫ | |||
*Originally, this level was to contain more explosive crates (both TNT and nitro) and the box total was 51. |
*Originally, this level was to contain more explosive crates (both TNT and nitro) and the box total was 51. |
||
| ⚫ | |||
| − | *It could be possible that the secret warp at the end was originally intended to be portal to another part of the level, which contained the extra |
+ | **It could be possible that the secret warp at the end was originally intended to be a portal to another part of the level, which contained the extra gem. |
| + | *In the N. Sane Trilogy, it is possible to complete this level without Polar, as seen in [https://www.youtube.com/watch?v=neKj1Xpq-wc this] video. The Crash Dash power-up is required. |
||
{{Cortex Strikes Back}} |
{{Cortex Strikes Back}} |
||
{{Crash Bandicoot N. Sane Trilogy}} |
{{Crash Bandicoot N. Sane Trilogy}} |
||
| + | |||
| + | [[es:Bear Down]] |
||
| + | [[fr:Bear Down]] |
||
| + | [[it:Bear Down]] |
||
| + | [[pt-br:Bear Down]] |
||
[[Category:Levels]] |
[[Category:Levels]] |
||
[[Category:Riding levels]] |
[[Category:Riding levels]] |
||
Revision as of 11:24, 15 January 2020
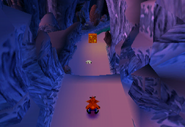
Bear Down (しろくま だいジャンプ lit. White Bear Big Jump in Japanese) is the thirteenth level and is the third level of the third warp room in Crash Bandicoot 2: Cortex Strikes Back and the Crash Bandicoot N. Sane Trilogy remaster of the second game. The level plays similar to Bear It, where Crash rides on Polar and must maneuver him through a maze of obstacles and enemies that he must avoid. The level of difficulty for this level is higher than Bear It, and it takes place during the evening rather than during the day. There are also more pits and obstacles that Crash and Polar must navigate around. The parka lab assistants are the new enemies. They lift iron crates and drop them every few seconds. The main objective of this level is to make it to the end of it without crashing into any enemies or obstacles. Since there are no Aku Aku masks in this level, Crash cannot hit any of the enemies that are scattered around the course. Crash can control the speed of Polar by having him speed up by pressing or R1, which allows him to reach higher crates, jumping over larger pits, and speeding up. However, if Crash goes too fast with Polar, then he has a higher chance of hitting another enemy or obstacle. Crash also has to be careful of the TNT crates around the level, as they will countdown as soon as he gets near them.
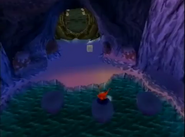
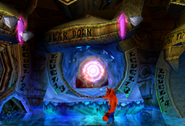
Once Crash reaches the end of the level, Polar will launch him across a giant chasm, which will place him in front of the exit to the warp room. However, if Crash turns his back to the warp room exit, he will notice a group of icebergs in the water. Crash can jump on the icebergs to access a secret portal, which will warp him to a secret warp room and allows him to go to the secret way of Air Crash, thus allowing him to get the crate gem. In the process of jumping on the icebergs, Crash has to be careful, as the icebergs will start to sink after being jumped on.
Types of crates
- Basic Crate
- Bounce Crate
- Checkpoint Crate
- Iron Crate
- Nitro Crate
- Nitro Switch Crate
- ? Crate
- Time Crate (1/2/3 seconds)
- TNT Crate
Hazard Count
Stage Parameters
Walkthrough
Enemies and Obstacles
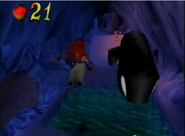
These are the different enemies and obstacles that Crash and Polar face while traveling through this level. Since there are no Aku Aku masks in the level, Crash cannot afford to hit any of the enemies, as they will cause him to instantly die.
Gallery
Viewing level
Trivia
- The name of the level is based on the phrase "man down!", which is used when a fellow soldier is wounded or killed in a battle.
- Although it could also be a play on the phrase "bearing down", which means to approach something in a determined and threatening manner, and usually fast.
- As with the other bear levels in this game, Aku Aku is banned from this level, so even if the player has Aku Aku masks when entering the level, the player loses them.
- There is a 2 second delay for the start of the music on the PAL version
- Originally, this level was to contain more explosive crates (both TNT and nitro) and the box total was 51.
- This level was originally intended to have 2 clear gems, as there is an extra unseen slot in the warp room at the left of the crystal slot. This slot, however, does not correspond to any gem, and is also badly lightened.
- It could be possible that the secret warp at the end was originally intended to be a portal to another part of the level, which contained the extra gem.
- In the N. Sane Trilogy, it is possible to complete this level without Polar, as seen in this video. The Crash Dash power-up is required.
| Crash Bandicoot N. Sane Trilogy | ||
| DLC Content | Crash Bandicoot: Stormy Ascent Crash Bandicoot: Warped: Future Tense | |

