No edit summary Tag: Visual edit |
No edit summary |
||
| (37 intermediate revisions by 18 users not shown) | |||
| Line 1: | Line 1: | ||
| + | {{Track-infobox |
||
| ⚫ | '''Assembly Lane''' is the |
||
| + | |image = <gallery> |
||
| + | Assemblylaneshortcut2.png|Original |
||
| + | Assembly_lane_nf.png|Nitro-Fueled |
||
| + | </gallery> |
||
| + | |game = ''[[Crash Nitro Kart]]''<br>''[[Crash Team Racing Nitro-Fueled]]'' |
||
| + | |world = [[Teknee]] |
||
| + | |token = [[Token|Red]] |
||
| + | |gem_cup = Red |
||
| + | |time_crates = 50<br> |
||
| + | [[File:1sec.png|20px]] 23 <br> |
||
| + | [[File:2sec.png|20px]] 14 <br> |
||
| + | [[File:3sec.png|20px]] 13 |
||
| + | |relic_times = CNK Console version:<br>Sapphire: 2:35:00<br>Gold: 2:10:00<br>Platinum: 1:45:00<br><br>Crash Team Racing Nitro-Fueled:<br>Sapphire: 2:52:00<br>Gold: 2:45:00<br>Platinum: 2:35:00 |
||
| + | |ghost_times = |
||
| + | CNK Console version:<br> |
||
| + | [[File:N.Tropy.png|25px]] 2:58:34<br> |
||
| + | [[File:Real Velo.png|25px]] 2:32:76 |
||
| + | <br><br> |
||
| + | Crash Team Racing Nitro-Fueled:<br> |
||
| + | {{CTRNF Mugshot|image=Crash Team Racing Nitro-Fueled Doctor Nefarious Tropy Icon.png|px=25}} 3:08:76<br> |
||
| + | {{CTRNF Mugshot|image=Crash Team Racing Nitro-Fueled Nitros Oxide Icon.png|px=25}} 3:00:41<br> |
||
| + | {{CTRNF Mugshot|image=Crash Team Racing Nitro-Fueled Emperor Velo XXVII icon.png|px=25}} 2:48:64<br> |
||
| + | {{CTRNF Mugshot|image=CTRNF-Pasadena O'Possum.png|px=25}} 2:28:38 (Sébastien M.) |
||
| + | |previous = [[Thunder Struck]] |
||
| + | |next = [[Android Alley]] |
||
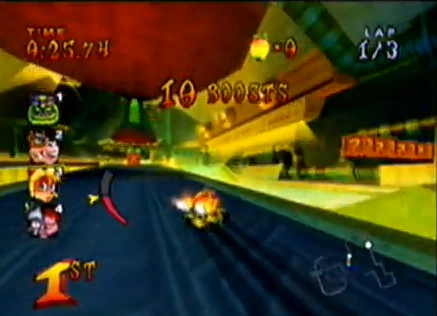
| ⚫ | |bg = red}}'''Assembly Lane''' (モクモク くみたてこうじょう lit. ''Ongoing Assembly Factory'' in Japanese) is the tenth race course that appears in ''[[Crash Nitro Kart]]''. This is the first race track in [[Teknee]] and takes place in a polluted factory. It has mud to slow down racers, like [[Tiny Arena]]. The track's name is a play on the phrase "assembly line". It is used in the Wumpa Cup and the [[Red Gem Cup]] (along with [[Inferno Island]] and [[Meteor Gorge]]). |
||
| + | |||
| + | This track returned in ''[[Crash Team Racing Nitro-Fueled]]''. |
||
==Track design== |
==Track design== |
||
| − | The factory includes an outdoor part with oil spills and sharp turns. The interior part of this track includes giant hills and machinery that will crush other racers if they don't take precautions. The level initially starts off in the exterior portion of the factory. The racers will encounter a few sharp turns with oils spills. If a racer drives in the oils spills, then they will lose traction and speed. Afterwards, they will come across a few small hills and an [[Activation Crate]]. The activation crate will switch the direction of the giant magnetic device that appears ahead. The racers will then enter the interior portion of the track, which contains a route with a conveyor belt and giant machinery, and a normal route. If a character is squished by one of the machines, then they will lose time and some [[Wumpa Fruit]] |
+ | The factory includes an outdoor part with oil spills and sharp turns. The interior part of this track includes giant hills and machinery that will crush other racers if they don't take precautions. The level initially starts off in the exterior portion of the factory. The racers will encounter a few sharp turns with oils spills. If a racer drives in the oils spills, then they will lose traction and speed. Afterwards, they will come across a few small hills and an [[Activation Crate|activation crate]]. The activation crate will switch the direction of the giant magnetic device that appears ahead. The racers will then enter the interior portion of the track, which contains a route with a conveyor belt and giant machinery, and a normal route. If a character is squished by one of the machines, then they will lose time and some [[Wumpa Fruit|wumpa fruit]]. The final portion of the track takes the racers on a giant pipe that contains item crates and speed pads. Before the finish line, the characters will come across a giant oil pit. |
===Obstacles=== |
===Obstacles=== |
||
| + | *'''Oil Pits''' - The oil pits appear in the exterior portion of the track, and are found usually around sharp turns. If a racer gets stuck in one of the oil pits, then the speed of their kart will reduce. The oil pits will also cause them to lose traction. |
||
| − | |||
| − | * |
+ | *'''Giant Magnetic Device''' - Before the interior portion of the track, there will be a giant magnetic device with an activation box in front of it. The activation box will change the direction the giant device will travel. If a character gets caught in the magnetic device's path, then they will be carried with it and lose time. |
| − | * |
+ | *'''Pounding Machinery''' - Once the racers enter the interior portion of the factory, they will come across a conveyor belt with three pounding machinery. If they decide to take the conveyor belt route, then they must avoid the pounding machinery. If they get caught in the machinery, then they will be squished and lose time. This route is optional and only contains an [[X crate]]. |
| − | * '''Pounding Machinery''' - Once the racers enter the interior portion of the factory, they will come across a conveyor belt with three pounding machinery. If they decide to take the conveyor belt route, then they must avoid the pounding machinery. If they get caught in the machinery, then they will we squished and lose time. This route is optional and only contains an [[X crate]]. |
||
===Shortcuts=== |
===Shortcuts=== |
||
| − | [[File:Assemblylaneshortcut2.png|thumb|The 2nd shortcut]] |
+ | [[File:Assemblylaneshortcut2.png|thumb|The 2nd shortcut.]] |
| − | * |
+ | *The first shortcut can be found towards the beginning of the track. When the racers come across the first sharp turn, there will be a small opening in the wall near the oil pit. In order for the racer to enter through the shortcut, they must either have a [[turbo]] or be power sliding. During the CNK/CTR challenge, the letter "C" will be located in this little alcove. |
| − | * |
+ | *The second shortcut is actually an alternate route in the track. When the player enters the interior portion of the track, they will encounter a giant conveyor belt with pounding machinery. The player must perform a boost or power slide in order to get on the conveyor belt. Once on the belt, they must avoid the pounding machinery, or they will be squished and lose time. |
| − | == |
+ | == Video == |
| + | <gallery> |
||
| − | + | Crash Nitro Kart-Assembly Lane race |
|
| ⚫ | |||
| + | </gallery> |
||
| + | |||
| + | ==Gallery== |
||
| + | ===Crash Nitro Kart=== |
||
| + | <gallery> |
||
| + | CNK_Assembly_Lane.png|Original map of Assembly Lane |
||
| + | assembly lane loading.png|Loading screen artwork |
||
| + | </gallery> |
||
| + | |||
| + | ===Crash Team Racing Nitro Fueled=== |
||
| + | <gallery> |
||
| + | Screenshot_20200528-150614_Gallery.jpg|Nitro-Fueled map of Assembly Lane |
||
| + | nf assembly lane concept.png|Concept art |
||
| + | nf assembly lane concept 2.png|Concept art |
||
| + | </gallery> |
||
| + | |||
| + | == Trivia == |
||
| + | * [[Doctor Neo Cortex]] has the best "race the trial" time for this track. |
||
| + | * While the outdoor sections are clearly inspired by Tiny Arena, the indoor portion has more of a resemblance to [[N. Gin Labs]]. |
||
| + | |||
| ⚫ | |||
{{Crash Nitro Kart}} |
{{Crash Nitro Kart}} |
||
{{Racecourses}} |
{{Racecourses}} |
||
| + | |||
| + | [[fr:Production]] |
||
[[Category:Race Courses]] |
[[Category:Race Courses]] |
||
[[Category:Crash Nitro Kart]] |
[[Category:Crash Nitro Kart]] |
||
| − | [[Category: |
+ | [[Category:Mechanical Levels]] |
| − | [[Category: |
+ | [[Category:Crash Team Racing: Nitro-Fueled]] |
Revision as of 22:54, 28 May 2020
Assembly Lane (モクモク くみたてこうじょう lit. Ongoing Assembly Factory in Japanese) is the tenth race course that appears in Crash Nitro Kart. This is the first race track in Teknee and takes place in a polluted factory. It has mud to slow down racers, like Tiny Arena. The track's name is a play on the phrase "assembly line". It is used in the Wumpa Cup and the Red Gem Cup (along with Inferno Island and Meteor Gorge).
This track returned in Crash Team Racing Nitro-Fueled.
Track design
The factory includes an outdoor part with oil spills and sharp turns. The interior part of this track includes giant hills and machinery that will crush other racers if they don't take precautions. The level initially starts off in the exterior portion of the factory. The racers will encounter a few sharp turns with oils spills. If a racer drives in the oils spills, then they will lose traction and speed. Afterwards, they will come across a few small hills and an activation crate. The activation crate will switch the direction of the giant magnetic device that appears ahead. The racers will then enter the interior portion of the track, which contains a route with a conveyor belt and giant machinery, and a normal route. If a character is squished by one of the machines, then they will lose time and some wumpa fruit. The final portion of the track takes the racers on a giant pipe that contains item crates and speed pads. Before the finish line, the characters will come across a giant oil pit.
Obstacles
- Oil Pits - The oil pits appear in the exterior portion of the track, and are found usually around sharp turns. If a racer gets stuck in one of the oil pits, then the speed of their kart will reduce. The oil pits will also cause them to lose traction.
- Giant Magnetic Device - Before the interior portion of the track, there will be a giant magnetic device with an activation box in front of it. The activation box will change the direction the giant device will travel. If a character gets caught in the magnetic device's path, then they will be carried with it and lose time.
- Pounding Machinery - Once the racers enter the interior portion of the factory, they will come across a conveyor belt with three pounding machinery. If they decide to take the conveyor belt route, then they must avoid the pounding machinery. If they get caught in the machinery, then they will be squished and lose time. This route is optional and only contains an X crate.
Shortcuts

The 2nd shortcut.
- The first shortcut can be found towards the beginning of the track. When the racers come across the first sharp turn, there will be a small opening in the wall near the oil pit. In order for the racer to enter through the shortcut, they must either have a turbo or be power sliding. During the CNK/CTR challenge, the letter "C" will be located in this little alcove.
- The second shortcut is actually an alternate route in the track. When the player enters the interior portion of the track, they will encounter a giant conveyor belt with pounding machinery. The player must perform a boost or power slide in order to get on the conveyor belt. Once on the belt, they must avoid the pounding machinery, or they will be squished and lose time.
Video
")
Gallery
Crash Nitro Kart
")
Crash Team Racing Nitro Fueled
")
")
Trivia
- Doctor Neo Cortex has the best "race the trial" time for this track.
- While the outdoor sections are clearly inspired by Tiny Arena, the indoor portion has more of a resemblance to N. Gin Labs.